I love working on surface design freelance projects, as every single one poses very specific obstacles I need to figure out. Getting into problem-solving mode is where I’m most creative and doing my best work. Let me guide you through one of my client projects to give you a better idea of how you can help small businesses yourself with your expertise.
The Client
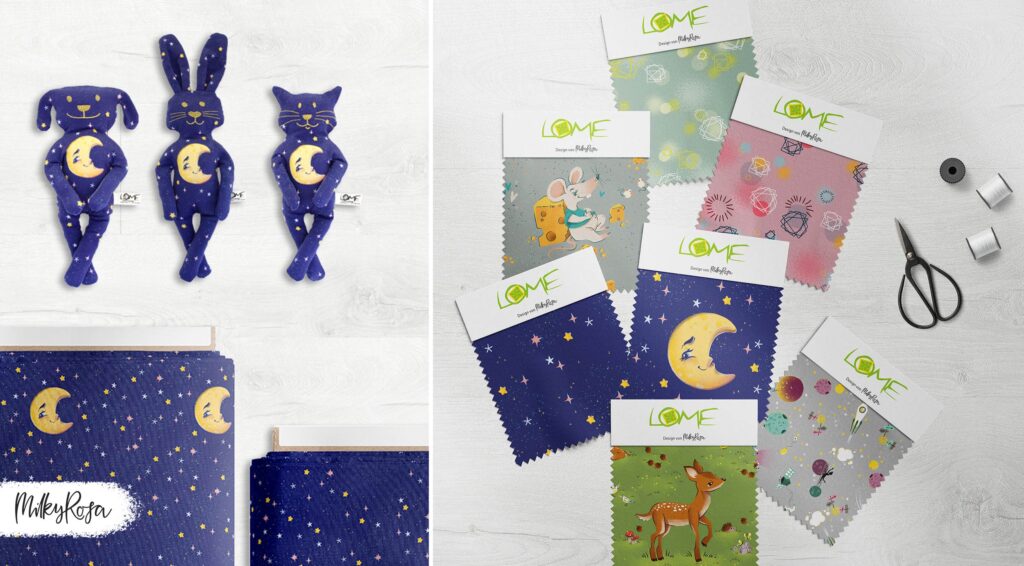
Meli from LOME runs her own small business selling herbal stuffed cuddly toys and first contacted me after she had read an article about my business in a local newspaper.
Meli used patterned fabrics for her products and some of them quickly became client favorites. But whenever it was time to reorder new stock, some of these motifs weren’t available or were discontinued altogether. This meant that her business suffered, because she could no longer offer the designs her clients were looking for.
That’s when Meli reached out to me to talk about custom patterns for her small business. She wanted to create her own fabric line because she wanted to make sure her products wouldn’t run out of stock due to someone else’s fault.
Client Communication
When working with clients, I prefer a mix of calls and emails for communication. But I always have a personal conversation, may it be in-person or online, for the first meeting, because I get to know their personality and it’s easier to tickle out all the information or feedback I need. It’s also way easier for them to express what they are thinking and I’m able to explain better why I design the way I do and how it solves their problems.
As a freelancer, it’s also important to protect yourself. That’s why a written contract is a must and getting each step signed off in writing is my way of protection, if anything should go wrong (like a client telling me it’s not what they wanted). That’s why I always use emails to get intermediate steps signed off.
You can read more about Contracts with Small Businesses here.
Motif Placement, Fabric Waste and Multiple Purpose Use
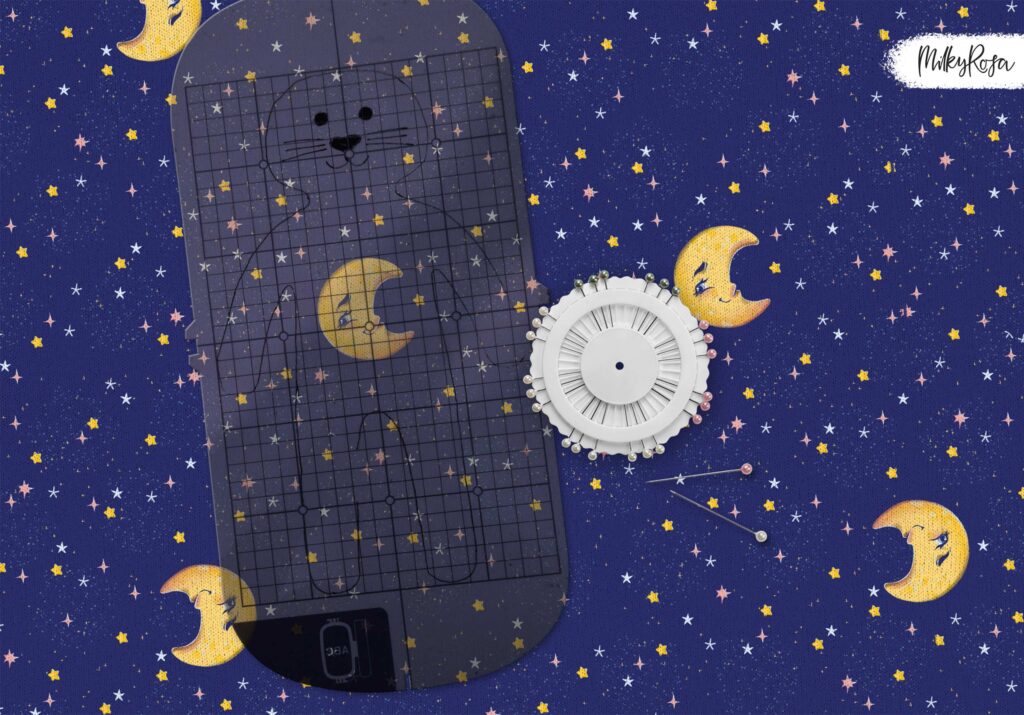
During my first meeting with Meli, I realized that she was facing problems because some of her current fabrics were difficult to work with: The motifs either obstructed the plushie’s faces, which she needed to embroider, or left her with a lot of wasted fabric scraps, because she had to pick a spot that worked best for placement.
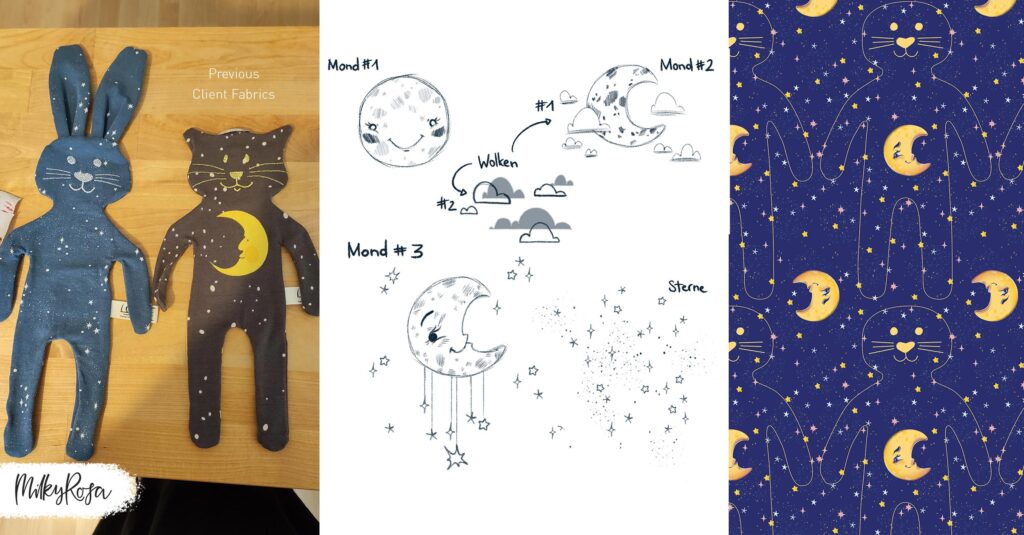
Either way wasn’t great, because she ended up with a less desirable look or lost money in the process. She also had to coordinate a less dense area for the face with a standout motif for the tummy, which made it even harder for her to use the whole fabric economically.
On top of that, Meli also wanted to sell the fabric by the yard or use it for other projects, like pillows. This meant that the arrangement of elements had to look great on each single item, but also on the yardage too.
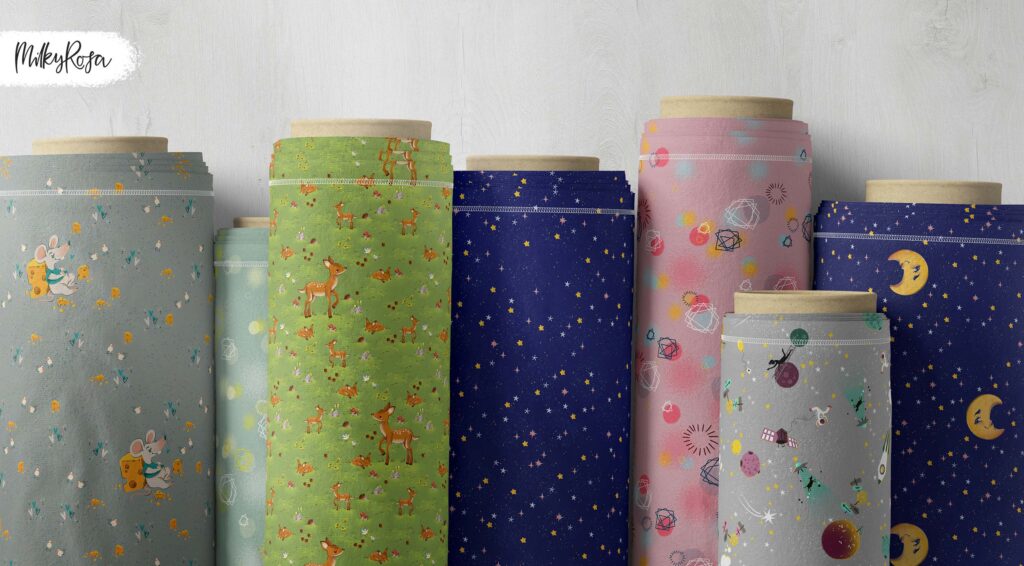
Here’s where I came in as a professional: I assured her that when using her own fabric line, this wouldn’t happen anymore. I asked for the plushie’s sewing patterns to design to Meli’s specific needs. I’d make sure no elements would obstruct the face anymore, that every plushie would have its signature element on the tummy, and she’d waste as little material as possible.
The Design Process
Before drawing a single line, I first contacted the manufacturer Meli chose to work with. I always ask my clients if it’s ok for them if I talk to the manufacturer directly and I have never worked with anyone who wasn’t ok with that. It’s one less thing on their plate and I can make sure I get all the information I need.
Related Article: Freelance Project Basics for Surface Designers
Manufacturer Communication
If you’ll be contacting manufacturers directly as part of your freelance work, here are some questions to consider when talking to a manufacturer for printing fabrics:
- Do they only work in vectors or are pixel-based files ok?
- Do they have a maximum amount of colors you can use?
- What’s the width of the fabric they are printing?
- Is there a maximum file size (in dimension or bites)?
- What are the printing file requirements (RGB or CMYK, file type, color profiles, resolution)?
- What are the specs for a sample print?
Project Structure
Only when I know all the answers will I start the design phase, which is always structured into these project steps:
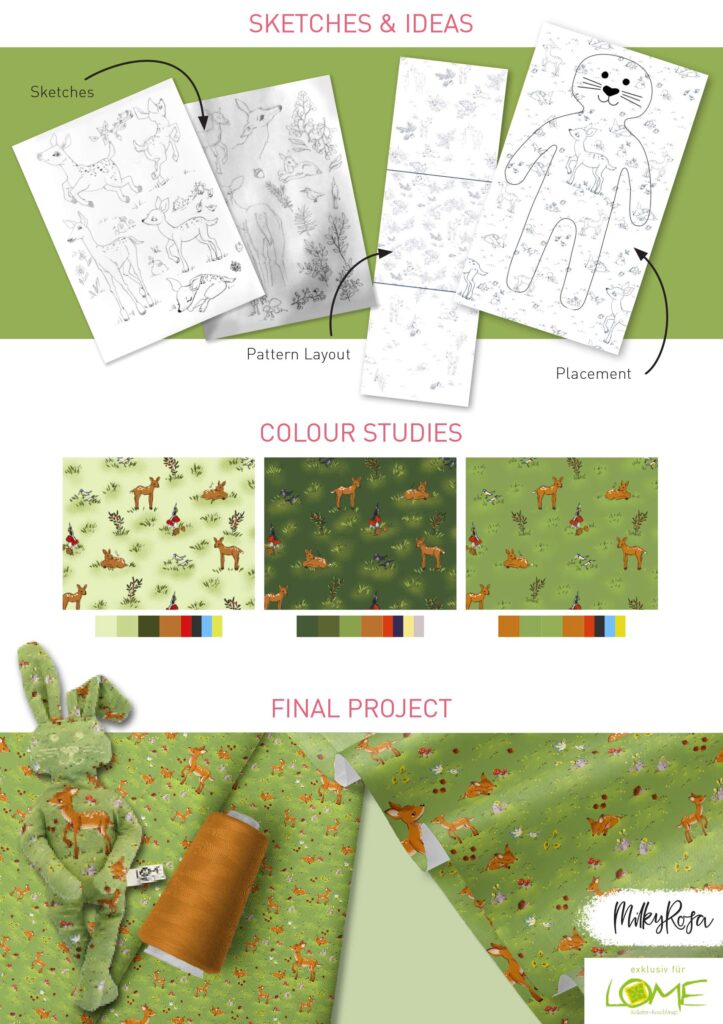
- Sketches & Ideas
- Rough Layout
- Color Studies
- Final Deliverables
In Meli’s case we added additional steps like Placement & Mockups and a test print. By sticking to this routine, I can guarantee that my client will love the outcome, because they never get any negative surprises. It also reduces my time spent on the project, as I only put in work if the previous stage has been signed off by my client.
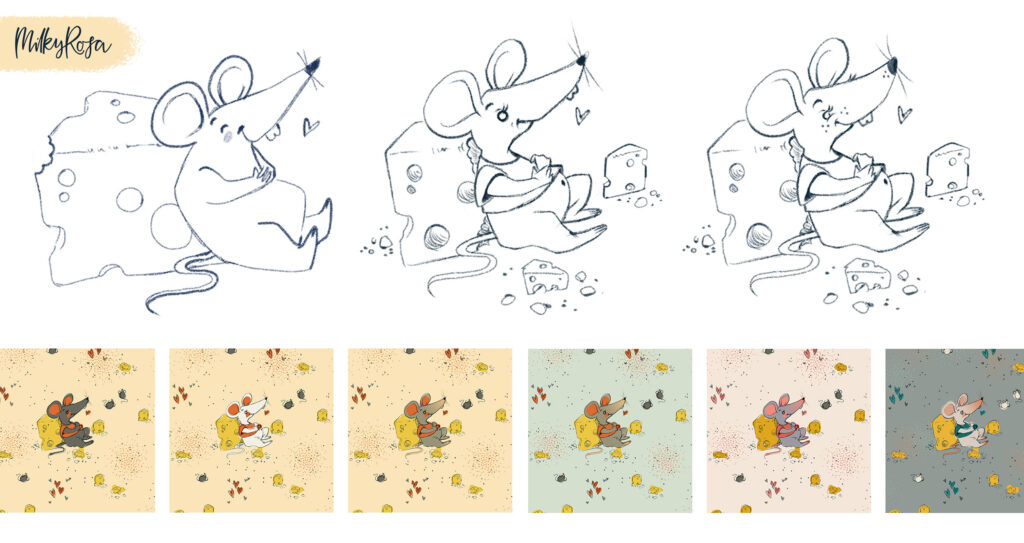
I always offer 2–3 different options for each phase, so my clients can choose what they like best and also see a bit of variation. I then combine their favorites into the finished piece.
Problem-Solving
Because I got Meli’s sewing and embroidery patterns, working around the placement issues was easy, as I first designed each plushie as a stand-alone item. As soon as I was happy with the result, I started to arrange the plushie shapes to create a seamless repeat tile.
The only thing that was left to do was to fill in the gaps with additional elements and slightly move some of them around to look and feel balanced to make sure Meli could sell it by the yard and save on waste when sewing her soft toys.
Test Print
We also agreed on getting a sample print produced, as she had to order at least 100 yards per design from the manufacturer. Getting swatches before committing to large quantities is always recommended, because you can tweak elements before the final print run and therefore avoid stock you’d otherwise be unhappy with (or worst case — be unusable altogether). Even though this step costs extra, it will help your client save money in the long run.
Deliverables
After all patterns got approved, I sent over all repeat files. Depending on the manufacturer’s specs, this is most likely a PDF. I always also include a JPG version for easy viewing. During the last call, I also check if there are still any questions on my client’s end. For the face and stomach placements, I wanted to be sure Meli knew how to use her new fabrics and talked her through on how to use them correctly.
Project Feedback
I always ask for feedback after a project has been finalized. First of all, it helps me build credibility with future clients and improve my services. But it’s also an amazing feeling to hear kind words after you’ve put your heart and soul into a project. You could even consider sending another feedback request a few months later, to see how your collaboration impacted their business.
This project showed me that we, as surface designers, aren’t just tools, creating pretty-looking artwork for clients — we are specialists in our field. And many small businesses don’t know the answers to their problems themselves. That’s where you can step up and show them how they can improve their business with your help.
Unsure where to find companies to work with? Read my blog post Finding Freelance Design Jobs with Smaller Companies.
Written by Nina Schindlinger
Website: www.milkyrosa.com
Instagram: @milkyrosadesignagency
Class: Create Your First Product
Nina is the founder and creative director of MilkyRosa Design Agency. She specialises in branding and product design for companies that are young at heart. Her design style is bold, playful and charming, which she uses for her own line of products to make the world a fun and colourful place.