
Vector art is powerful because of its versatility — you can enlarge it without losing quality and repurpose it for new designs. While Illustrator’s Pen tool is great for precision, it lacks the freehand expressive feeling you get from natural drawing tools. With the evolution of iPad apps Adobe Illustrator and Adobe Fresco in the last few years, artists have more options for line drawing and inking in vector. Which one is better? The answer depends on the tools you use.
Here are my top 3 tools for vector drawing on the iPad:
1. Best for a natural look: Fresco Vector Jitter Brushes
Fresco’s jitter brush is the most responsive, adjustable, naturalistic vector brush out there (sorry, Illustrator Blob Brush!)
How it works: it draws every stroke as a vector shape (closed path), like Illustrator’s Blob Brush. Once I complete a drawing in Adobe Fresco, I can send a copy to Illustrator to have complete editing control over the anchor points and curve handles.
Why it’s my favorite: Linework gets organic character and texture from the extensive brush settings and pressure sensitivity.
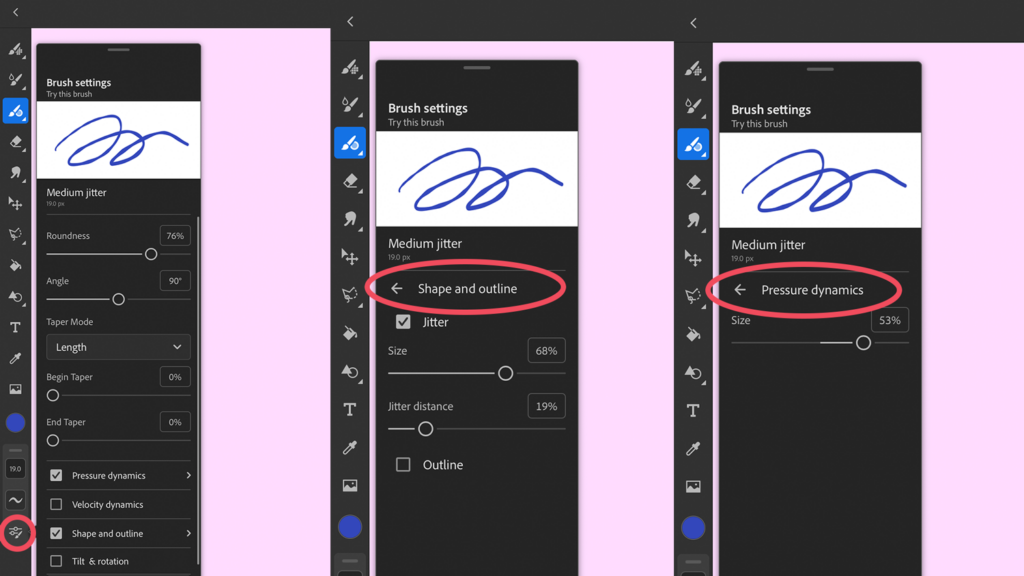
(above) Jitter brush settings in Adobe Fresco
The settings: Select a vector jitter brush and tap the brush settings icon. Under Shape and outline, adjust the jitter size and distance. Draw a stroke in the preview area to test it. Adjust the Pressure dynamics to add even more variation. Check Outline to create an open, outlined stroke.
Good to know: You can’t save custom vector brushes (as of this writing). Instead, you can adjust the available brushes and tap the star to add them to the favorites list for the open document. I take screenshots of my favorite settings.
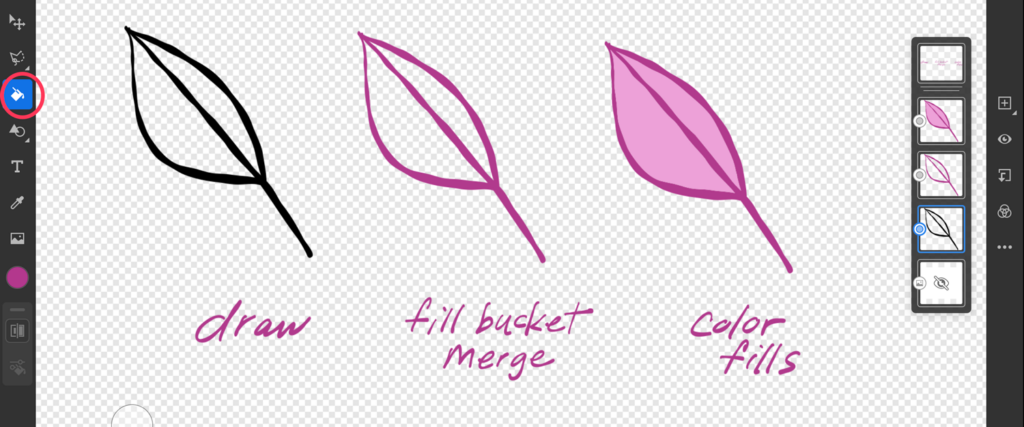
(above) Using the Fill bucket to merge strokes in Fresco
Merging strokes: The vector brush doesn’t automatically merge strokes of the same color. Every time you lift your pencil, a new stroke shape is created. This isn’t evident in Fresco, but it comes into play when editing the drawing in Illustrator.
Merge tip: After drawing, tap on a brushstroke with the Fill bucket, and any strokes connected to it with the same color will be merged. You can fill open areas of a drawing with the Fill bucket, but ensure there are no gaps in your linework first, or you will fill the whole layer.
Vector trimming: Holding the outer touch shortcut lets you swipe through a stroke to trim where it intersects another stroke.
Editing in Fresco: Use the eraser tool, or hold the inner touch shortcut to erase with the same brush. You can use Transform to scale, skew, and distort selected art.
Avoid clipping masks: Clipping masks on Fresco vector layers turn into image layers when you copy them to Illustrator.
Sending to Illustrator: To prepare your art for Illustrator, hide layers you don’t want to copy and merge strokes as needed before exporting. Tap Publish & export > Open a copy, and choose Illustrator on the iPad or desktop. In Illustrator, choose Convert layers to objects, and tap OK.
2. Best for smooth curves: The Illustrator Pencil Tool
The pencil tool on the iPad has almost replaced the Pen tool for me. It’s not as precise, but the natural flow of drawing freehand makes up for it.
The trick for flowing curves: Set the smoothing slider at around 7–8. Any higher is like trying to draw with a garden hose; lower settings add more anchor points, making editing take longer.
How to: Pause as you draw to create a corner point, changing the curve direction. Tap-draw on an endpoint to connect to an existing path.
Shortcuts: The inner touch shortcut draws straight segments at a constrained angle, and the outer shortcut draws straight segments at any angle. Double-tap the touch shortcut to lock/unlock it (like in Fresco).
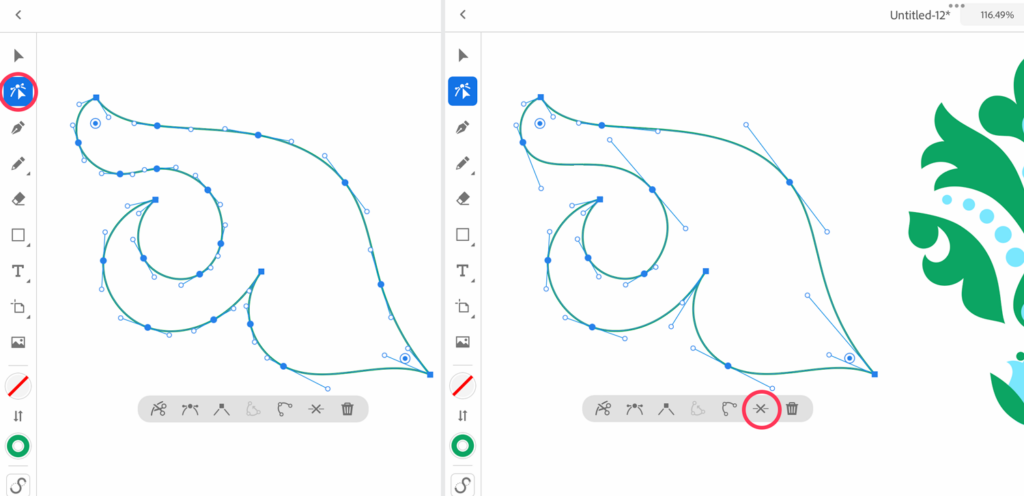
(above) A curvy Pencil tool path before and after editing with Smart delete
Editing paths: I’ll selectively remove anchor points after drawing, making the curves easier to edit. To remove a point, select it with the Direct Selection tool, and tap the Smart Delete “X” on the actions bar to remove it without changing the curve.
I’m careful about using the Simplify Path option to remove all excess anchor points at once because, frustratingly, it converts smooth points to corner points. Double-tap a point with the Direct Selection tool to convert back from corner to smooth and vice versa.
Related Article: Photoshop vs Illustrator: Which Is Better
for Surface Design?
Editing tip: Zoom in as much as needed. I find that working precisely is harder on the iPad than on the desktop, and sometimes I’ll find points on the iPad that overlap, and I can’t quite untangle them. I take the win for drawing with such freedom, and I’ll open the document on the desktop later if I need maximum control.
3. Best combination: A Pixel brush in Fresco and Vectorize in Illustrator
I use this workflow to vectorize Fresco pixel line drawings for coloring in Illustrator.
Tips for line art in Fresco
- Choose a Pixel brush with noticeable texture, like the Newsprint inker or Conte crayon
- Avoid soft, grainy, faint, or washy brushes that will be difficult to vectorize
- Draw in black and white without gray tones for the clearest Vectorize result
- Start simple — complex drawings cause slow performance; it’s better to trace those on desktop Illustrator.
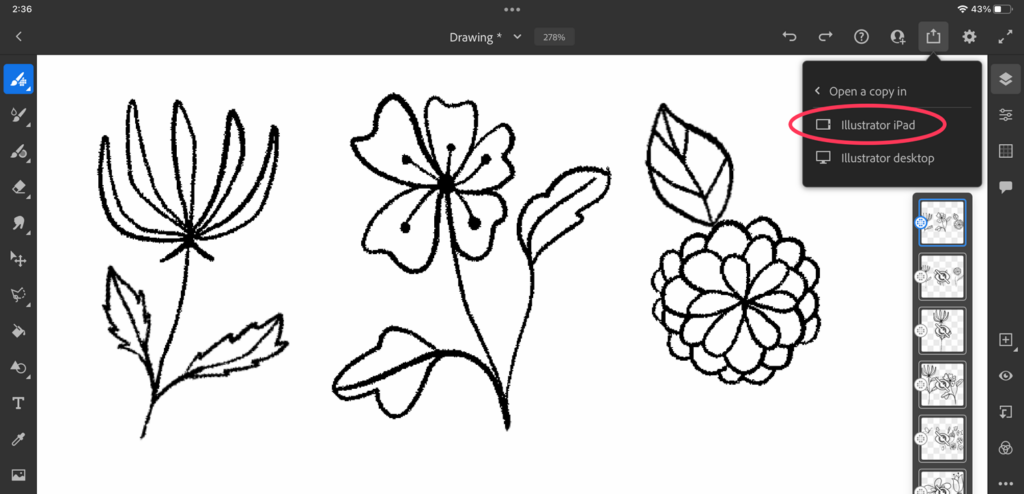
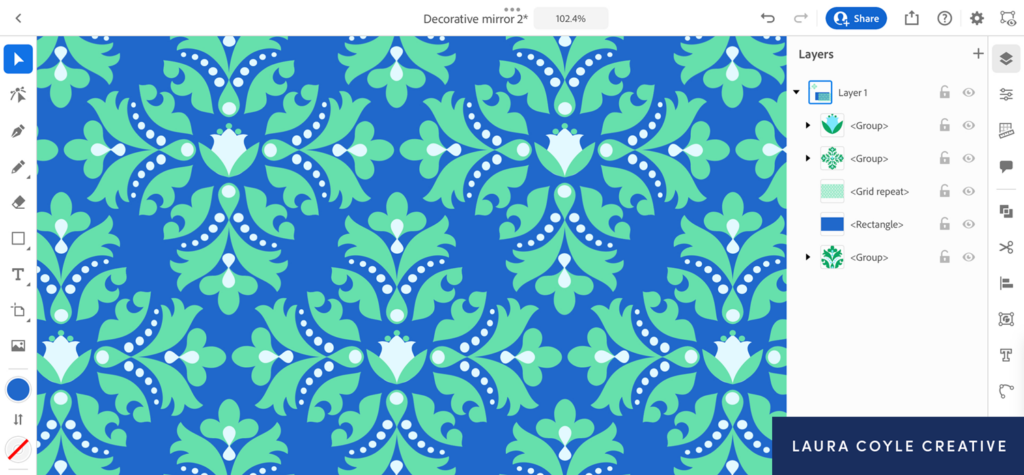
(above) Send the drawing from Adobe Fresco to Illustrator
Thinking ahead to Illustrator
You can only vectorize one image at a time in Illustrator, so merge your line art layers in Fresco to create fewer images. Keep any coloring on separate layers. When you are ready to send the drawing to Illustrator, turn off the visibility of everything but the line art layer and then choose Export > Open a copy > Illustrator iPad.
In Illustrator, select the image and tap the Vectorize option in the actions bar. In the Properties panel, experiment with settings to see what best captures your drawing.
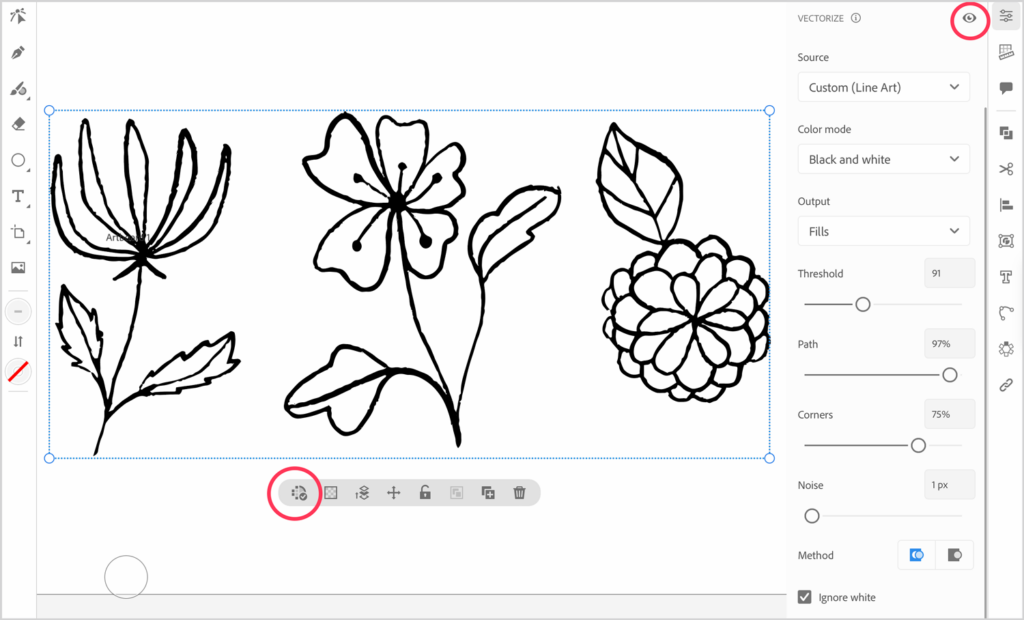
(above) Adjust the vectorize settings in Adobe Illustrator on the iPad
Tips for vectorizing a line drawing in Illustrator on the iPad
- Choose the Line Art source preset; choose Fills for Output
- Check Ignore white
- Higher Path and lower Noise numbers will capture more detail
- Be sparing; too much detail can slow Illustrator’s performance
- Use the eye button to compare the original to the tracing, then tap Expand vectorization
Simplify paths: After expanding, select your drawing and switch to the Direct Selection tool to use the Simplify path feature (on the actions bar or Path menu). This removes excess anchor points.
Color: Tap the fill icon to change the color of your line drawing. Add coloring on a separate layer with the Pencil tool or Blob Brush.
I love having the iPad as part of my vector workflow to draw freely and get away from my desk. When I’m ready to use some of the most powerful features on the desktop version of Illustrator, like Recolor Artwork or Live Paint, my drawings are waiting for me right on the home screen — it’s the best of both worlds!

Written by Laura Coyle
Website: www.lauracoylecreative.com
Instagram: @lauracoylecreative
In her 25-year career Laura Coyle has illustrated for major brands including Target, Hallmark, Hasbro, Amazon, Disney and Papyrus — all while working in Adobe Illustrator. As an instructor she loves making Illustrator and Creative Cloud accessible and teaching you the “why” behind her techniques.


Great tips, I’m starting to use Fresco more and these are really helpful!
Thx! I was just wondering this so perfect timing!
Oh I love this article! I use Fresco a lot, and have also encountered the bajillion points issue, individual vector sections when I would first imported the art into Illustrator. Great tips for reducing vector points and making natural looking lineart!
Laura, thanks so much for these great tips. So much I hadn’t ever thought about. Number three has opened up so many new possibilities.
Hi Sarah, Thank you! Have fun with it! – Laura
Thanks, Laura!
Is it possible to open the file back in Fresco after editing it in Illustrator?
Hi Monica, When you do an “open a copy” in Illustrator – that opens a copy of the art in an Illustrator file, and Illustrator files can’t be opened in Fresco. – Laura