
Adding your logo or brand to every social post is one of the best steps a surface designer can take to ensure an art director can find you when they see your work. Setting up an Adobe Creative Cloud Library for your brand makes it easier to quickly apply logos, fonts, type, and colors consistently as you export your designs for sharing.
Why use CC Libraries?
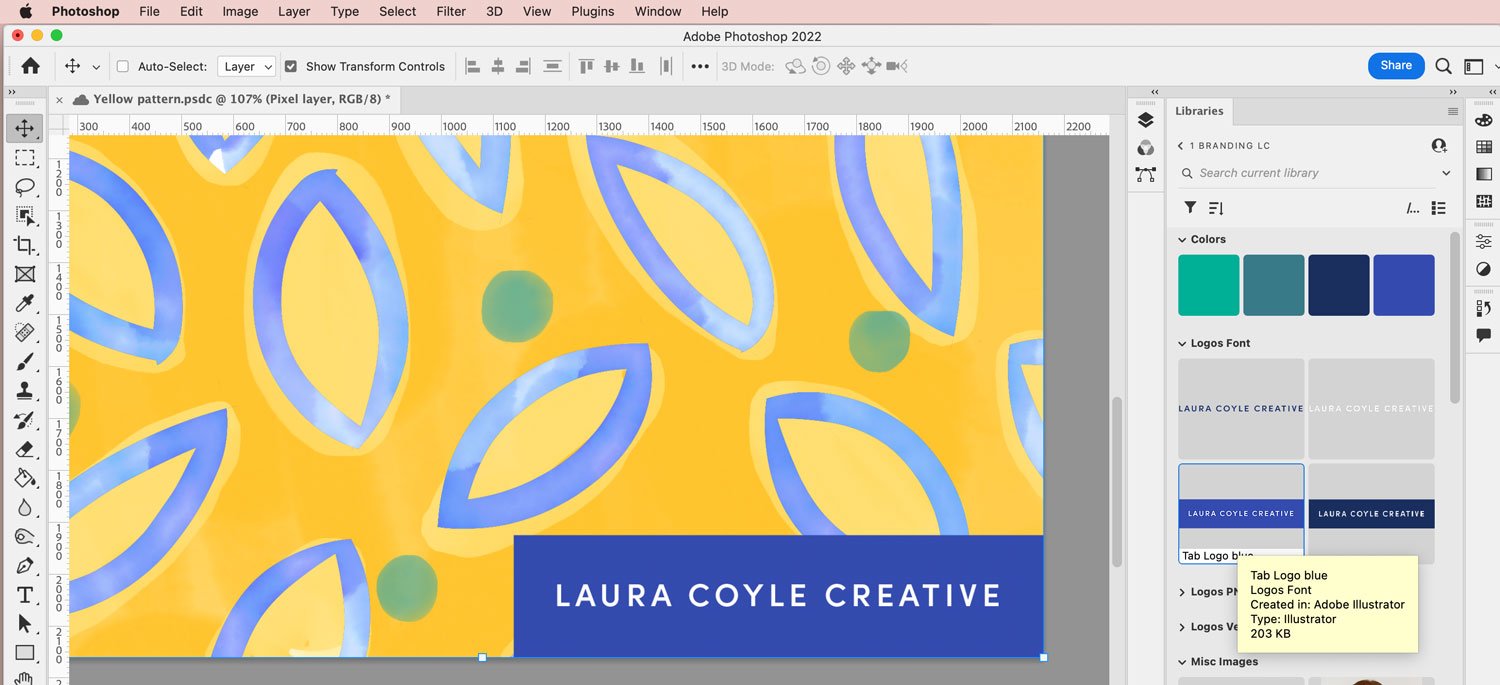
I love having my brand assets one click away in Photoshop, Illustrator, and InDesign. When it’s time to create a post, update my portfolio, or even sign my illustrations, I never have to search for a logo.
-
Libraries are shareable, making it easy to collaborate with others.
-
Access them in mobile apps like Adobe Fresco and Illustrator on the iPad.
-
Once you’ve organized your brand library, drag and drop images from Creative Cloud to Dropbox for use in Procreate or other apps outside of Adobe.
Shannon gives more tips for protecting your work online as you promote it.
Start Building Your Brand Asset CC Library
1. Create your logo in Illustrator on the desktop first for the most flexibility in resizing and editing later.
2. Start a new Creative Cloud Library by clicking the plus button inside the Libraries panel in Adobe Illustrator (Window > Libraries).
3. Select your logo, click the plus (+) button at the bottom of the Libraries panel, and choose Graphic to add it to the library.
4. To add an image file of your logo to the library for use in Fresco (or other pixel-based apps), export it as a PNG from Illustrator. Locate the PNG on your system, open the Creative Cloud Desktop app, and drag the file directly into your brand library.
A quick tip for Adobe Illustrator: save at least one copy of your logo with vector-outlined type to avoid font incompatibility issues. In Illustrator, outline type by selecting it and choosing Type > Create Outlines.
What to Include in Your Brand Library
Think of the many surface design promos you create and what is needed to keep them consistent. From social media posts to PDF sell sheets and website updates, what items do you repeatedly use that would help you work faster?
Here are some ideas:
-
Logo variations for different uses:
-
A white logo with a transparent background
-
A dark logo with a transparent background
-
Tab-style logo with a solid background for Instagram posting
-
-
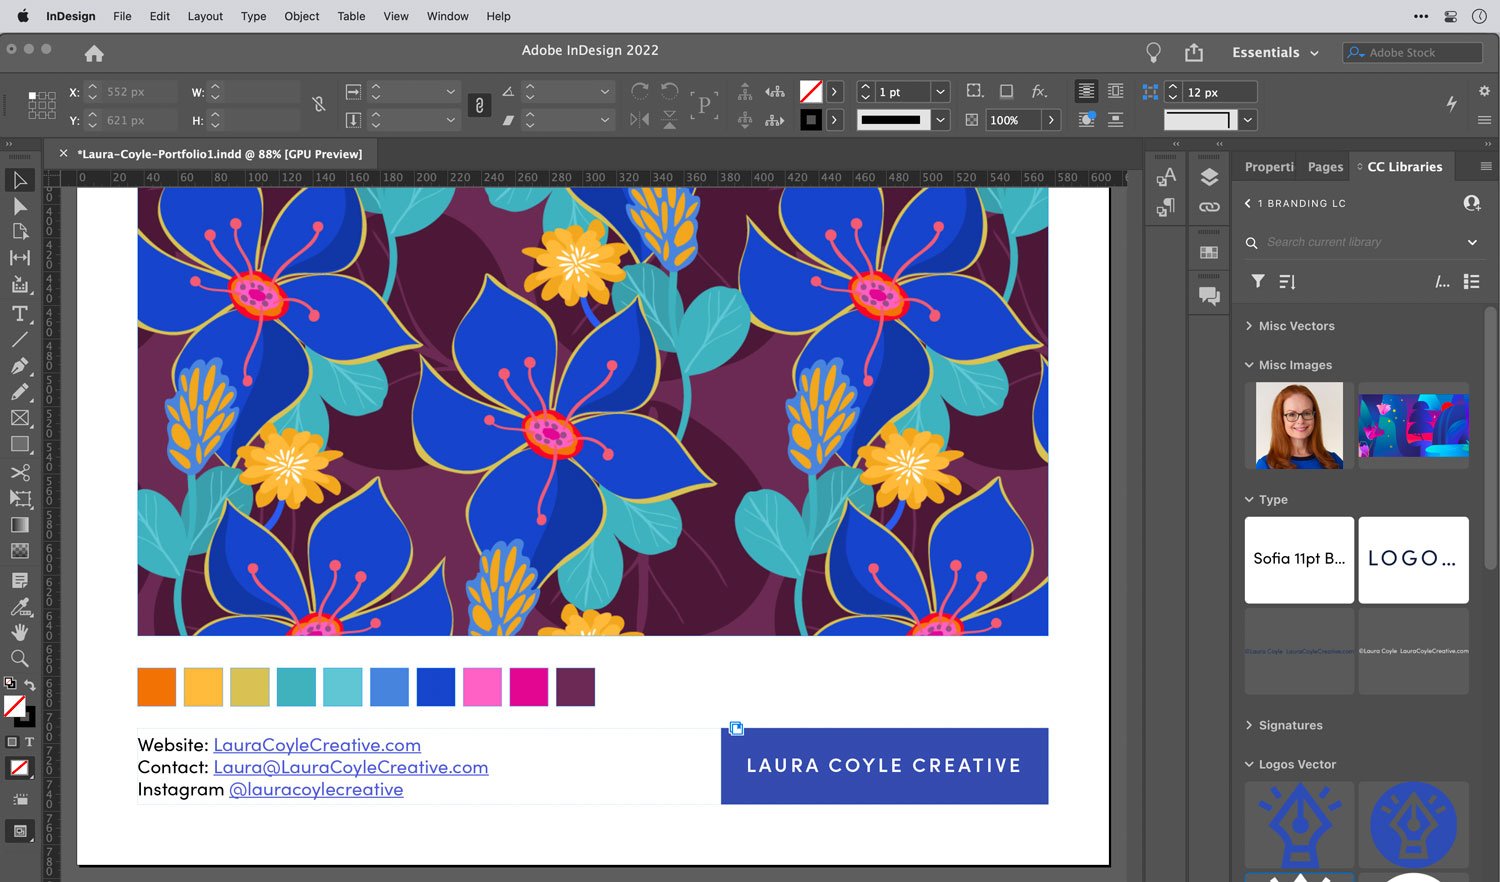
Character styles for type, ready for creating portfolio sell sheets
-
Copyright notice (use Option/Alt + G for ©)
-
Your signature, ready for signing your work or adding to contracts
-
Website URL and email address in your brand font
-
Your headshot/avatar, a featured image for your Squarespace site, or other images
Tips for Working Efficiently
-
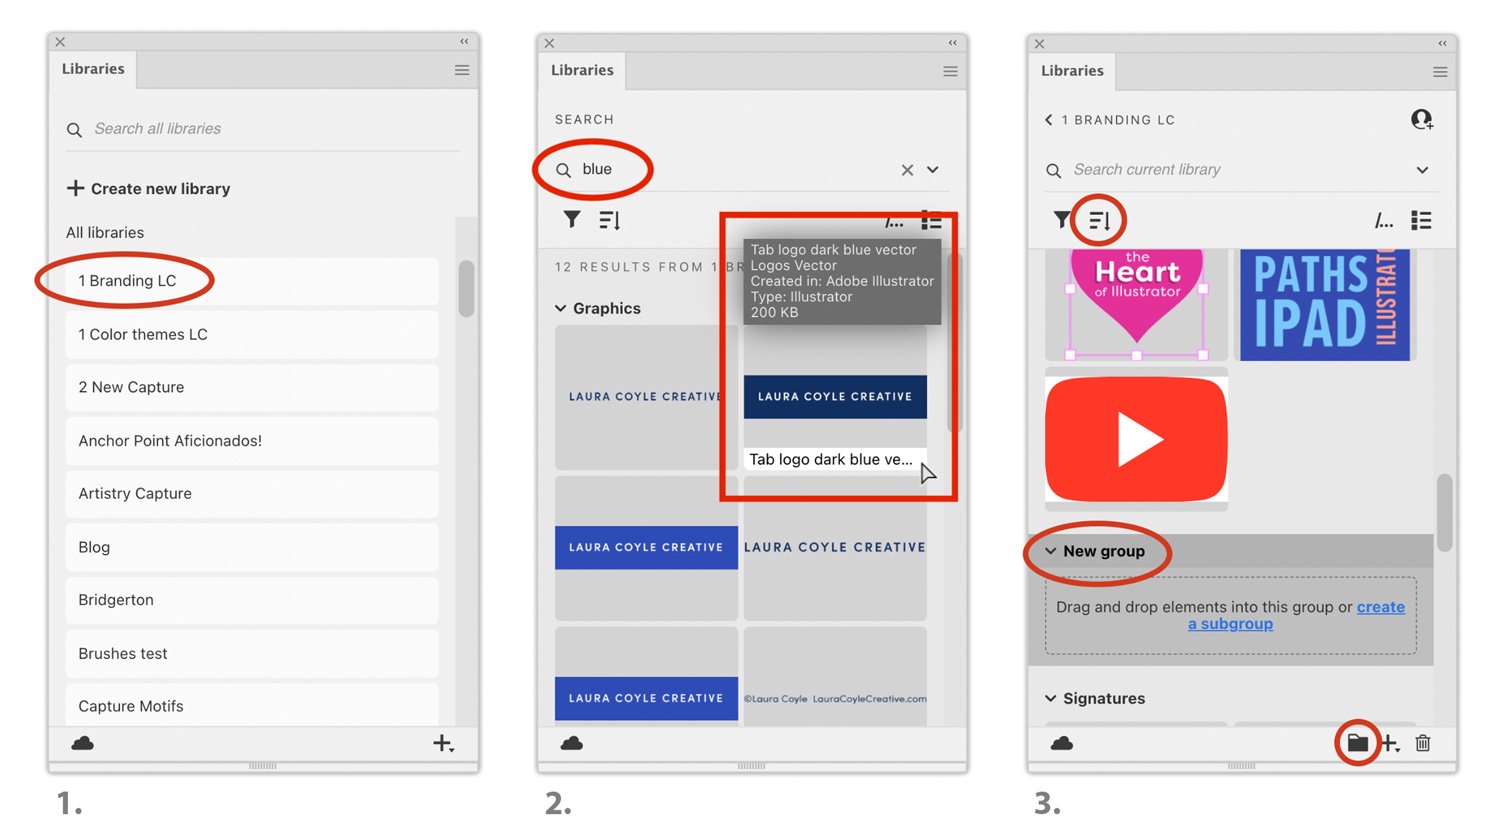
Name your library with a number or character at the beginning. Libraries are listed alphabetically throughout Creative Cloud. I’ve named mine “1 Branding LC” to save scrolling.
-
Asset names and descriptions are searchable in the desktop apps. Use descriptive words like logo, signature, and blue. Double-click an asset name in the library to change it. Add descriptions by right-clicking (or control-clicking) on the asset thumbnail.
-
Use custom groups to organize your brand assets. Click the folder icon in the Libraries panel and use titles like Colors, Logos Vector, or Logos PNG. Drag and drop assets into the new groups in the Libraries panel. To see your grouped assets, click the Sort options icon at the panel’s top and choose Custom group.
Share CC Libraries
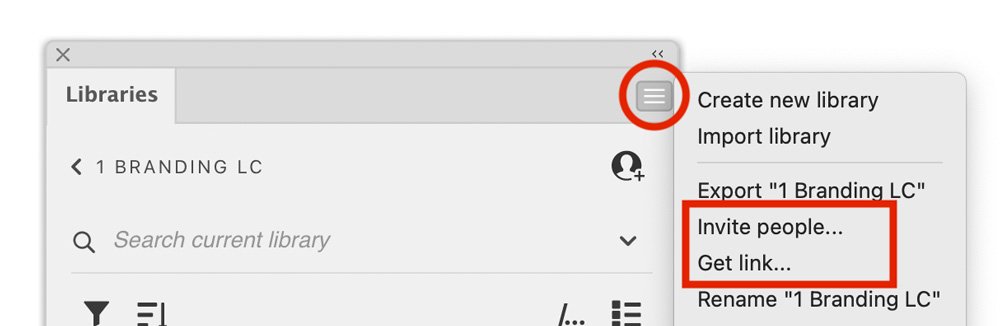
Go to the Libraries panel options fly-out to invite collaborators or get a link to share:
Choose Invite people.… and enter your team member’s Adobe ID address, and they will receive a notification email. Choose Can edit to permit them to edit the library.
Choose Get link… and check Allow follow. Followers can use the assets but not make changes to the library, and they will automatically receive updates when you make edits.
Using and Editing CC Library Assets on the Desktop
1. Decide first if you want to use a linked logo or a copy of the logo in your document.
Linked graphics are updated automatically when the original is edited in the library. This is useful when one designer manages the assets of a team. Dragging and dropping your logo from a library to a document inside Illustrator, Photoshop, or InDesign automatically links it to the CC Library.
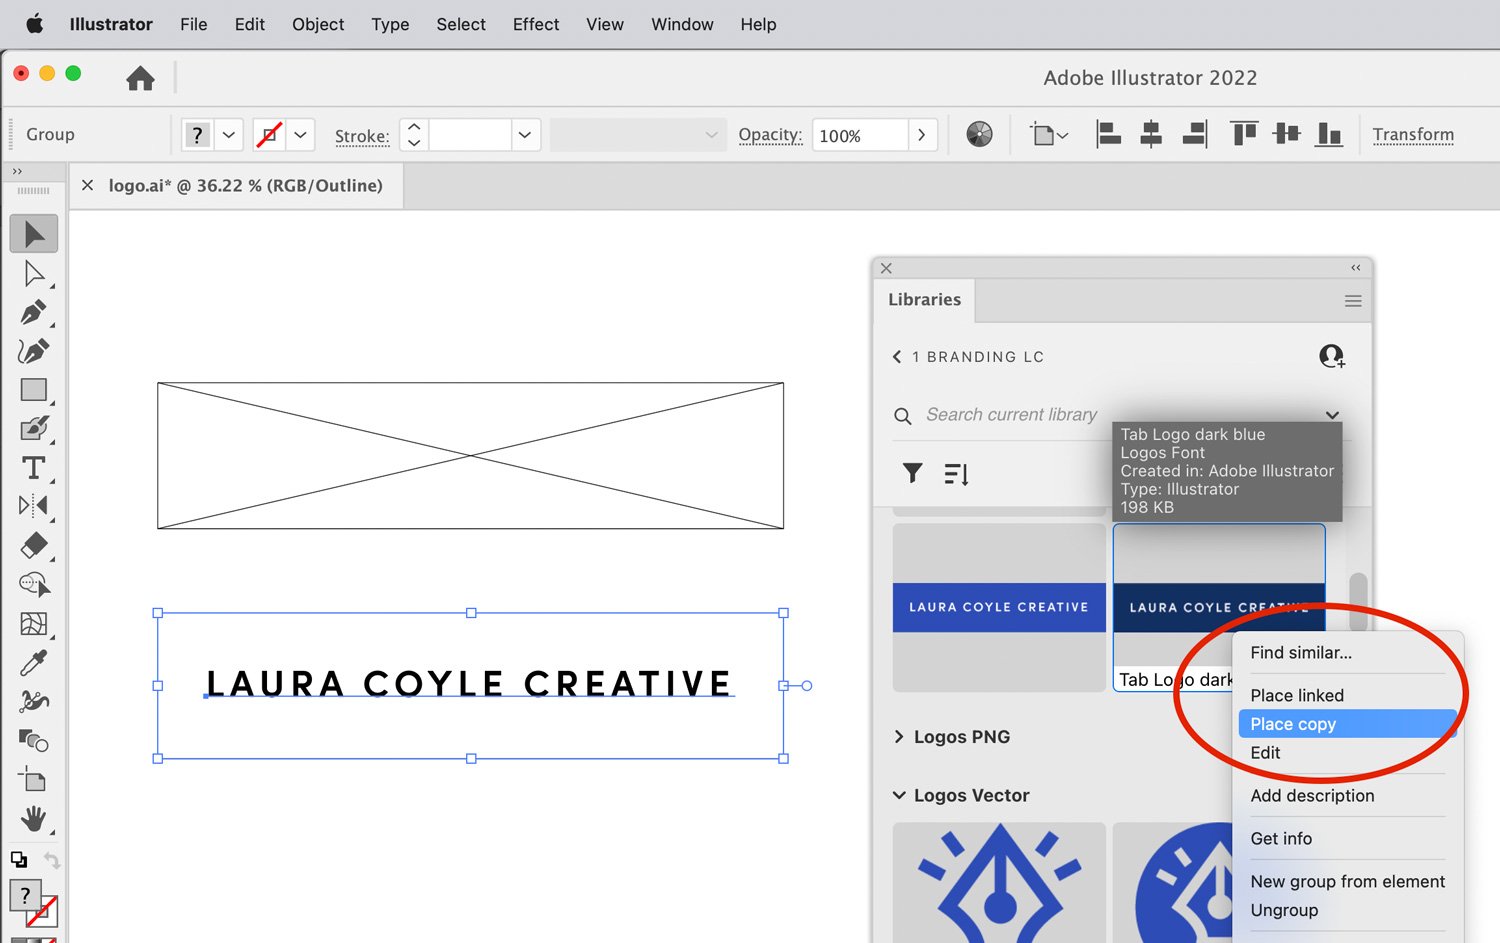
Placed copies of a logo are not linked to the library and can be edited/customized directly on the artboard in Illustrator. Right-click or control-click on the thumbnail in the library and choose Place copy from the drop-down menu.
2. To edit a graphic, double-click on its thumbnail, and it will open in a separate Illustrator or Photoshop document.
Make sure to save your edits, then close the document. You’ll see your changes updated in the library thumbnail and any linked graphics.
3. In Photoshop, the Illustrator graphics you place will be fully scalable.
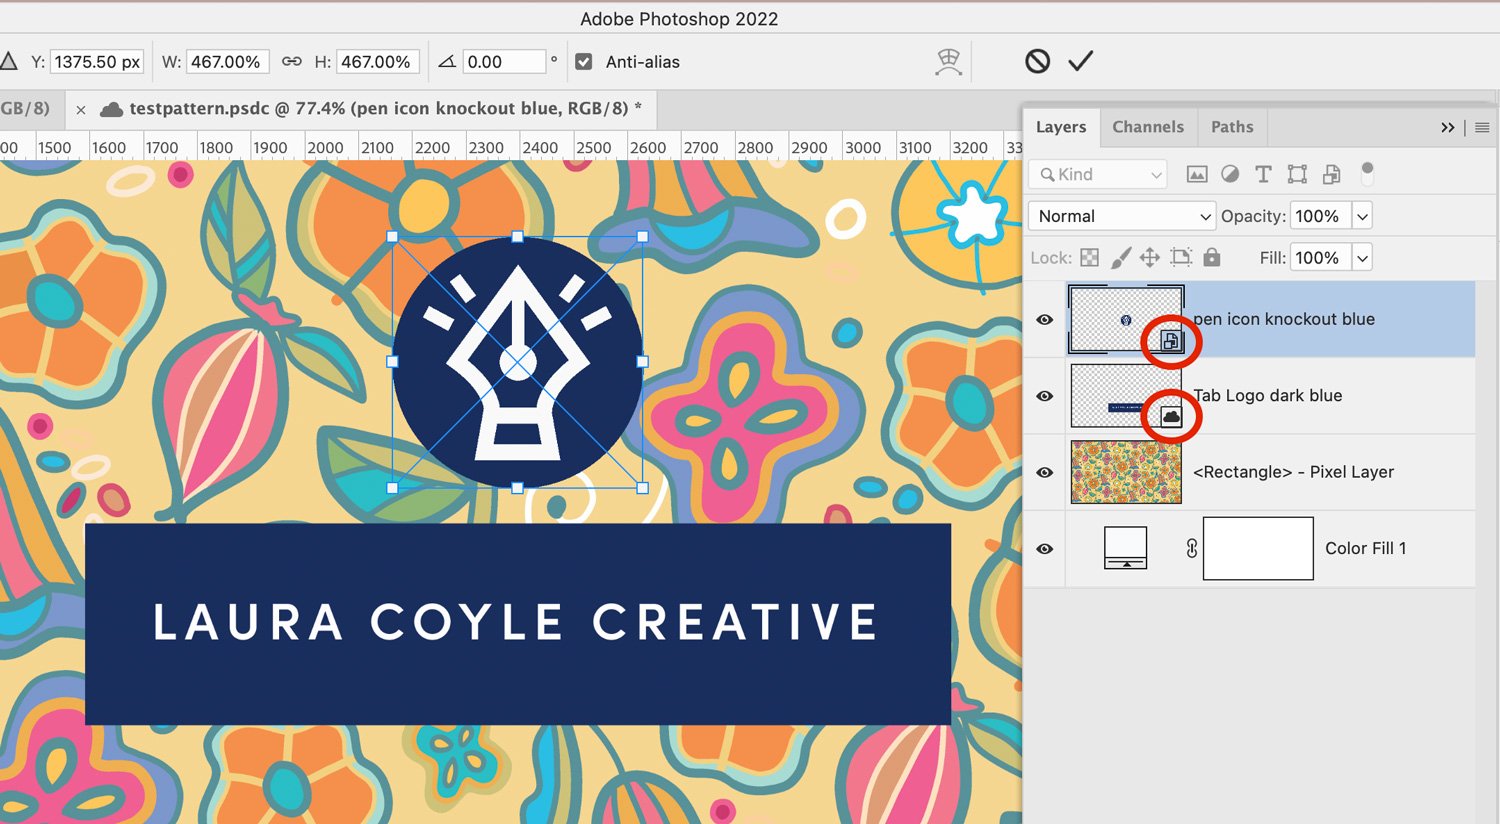
If you choose Place copy, Photoshop creates a Smart Object layer. Double-click on the layer thumbnail to open the graphic in Illustrator and make edits without affecting the original library graphic.
If you choose Place linked, that layer will show a cloud icon. Double-click the layer thumbnail to edit the original library graphic in Illustrator. Save your edits in Illustrator and return to Photoshop to view them.
Using CC Library Assets in Fresco and Illustrator on the iPad
You can place copies of your graphics from a CC Library to your document, but you can’t save graphics into a library from Fresco or Illustrator on the iPad.
 Adobe Fresco
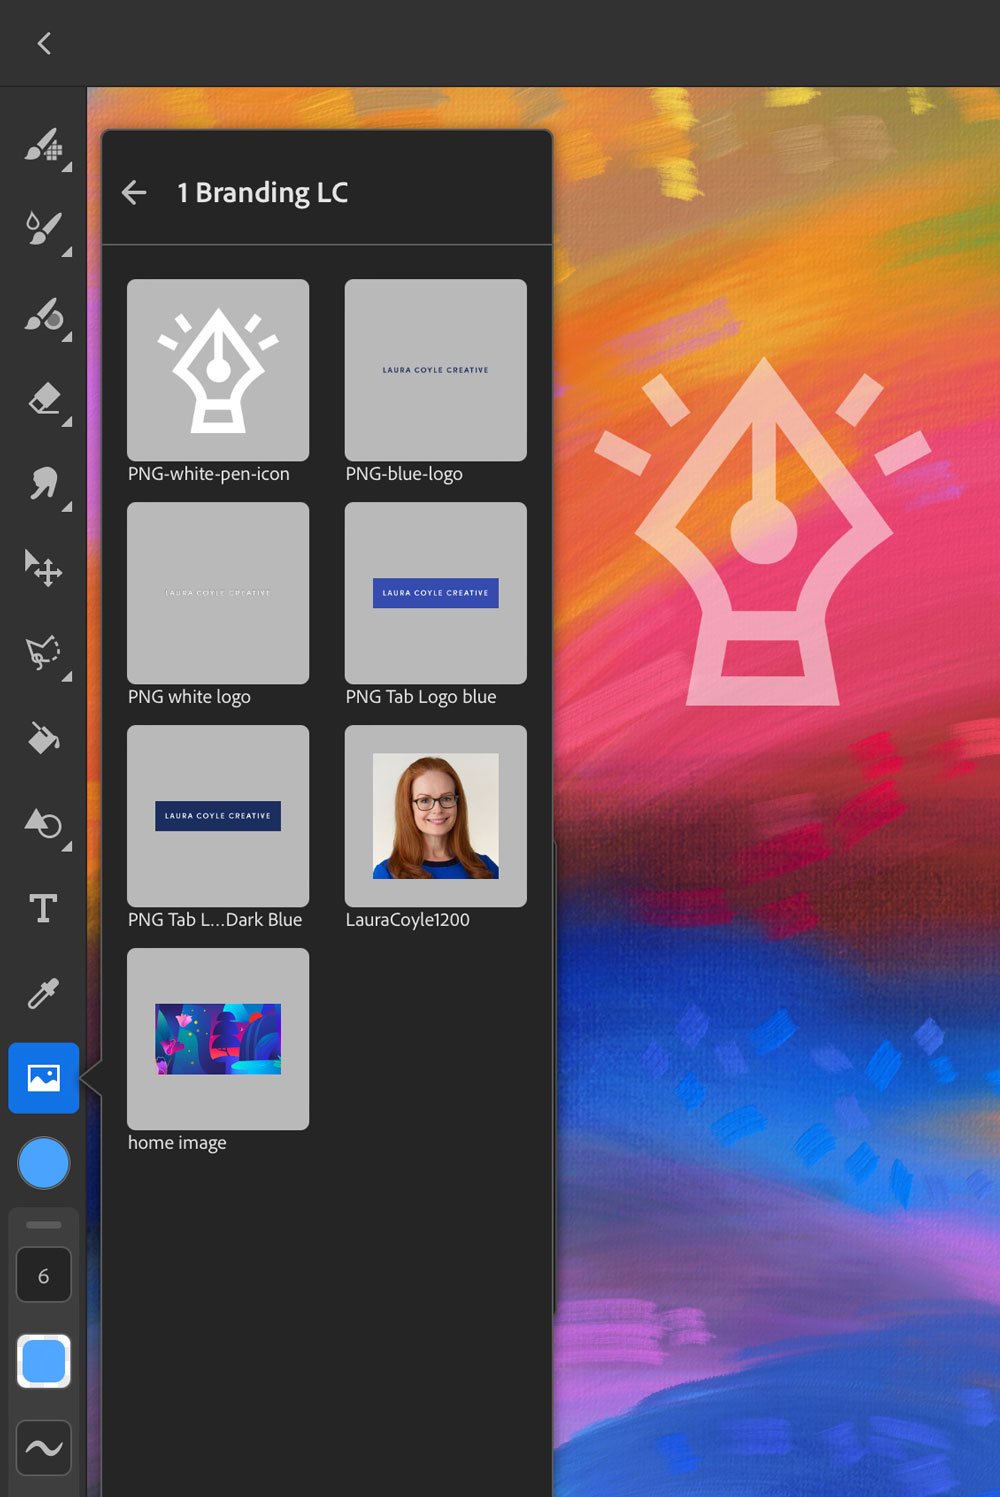
In Fresco, you can only place images from CC Libraries, not vector logos. Save copies of your logo in PNG format to the library to make them compatible with Fresco.
-
To place a PNG logo in Fresco, go to the Image menu and choose CC Libraries.
-
To use a color swatch, go to the Color panel, choose All colors and locate your CC library there.
CC Library graphics are placed on an image layer in Fresco and sized to the width of your artboard. On an image layer, your logo can be scaled without loss in quality. If you convert the image layer to a pixel layer, it will be the exact resolution as your file and can’t be enlarged without losing quality.
Illustrator on the iPad
I like to outline the fonts in my logos to avoid slow syncing or incompatibility issues. Do this in Illustrator on the desktop to make vector logos easier to use on the iPad.
-
To place a logo in Illustrator on the iPad, go to the Image menu and choose Your libraries.
-
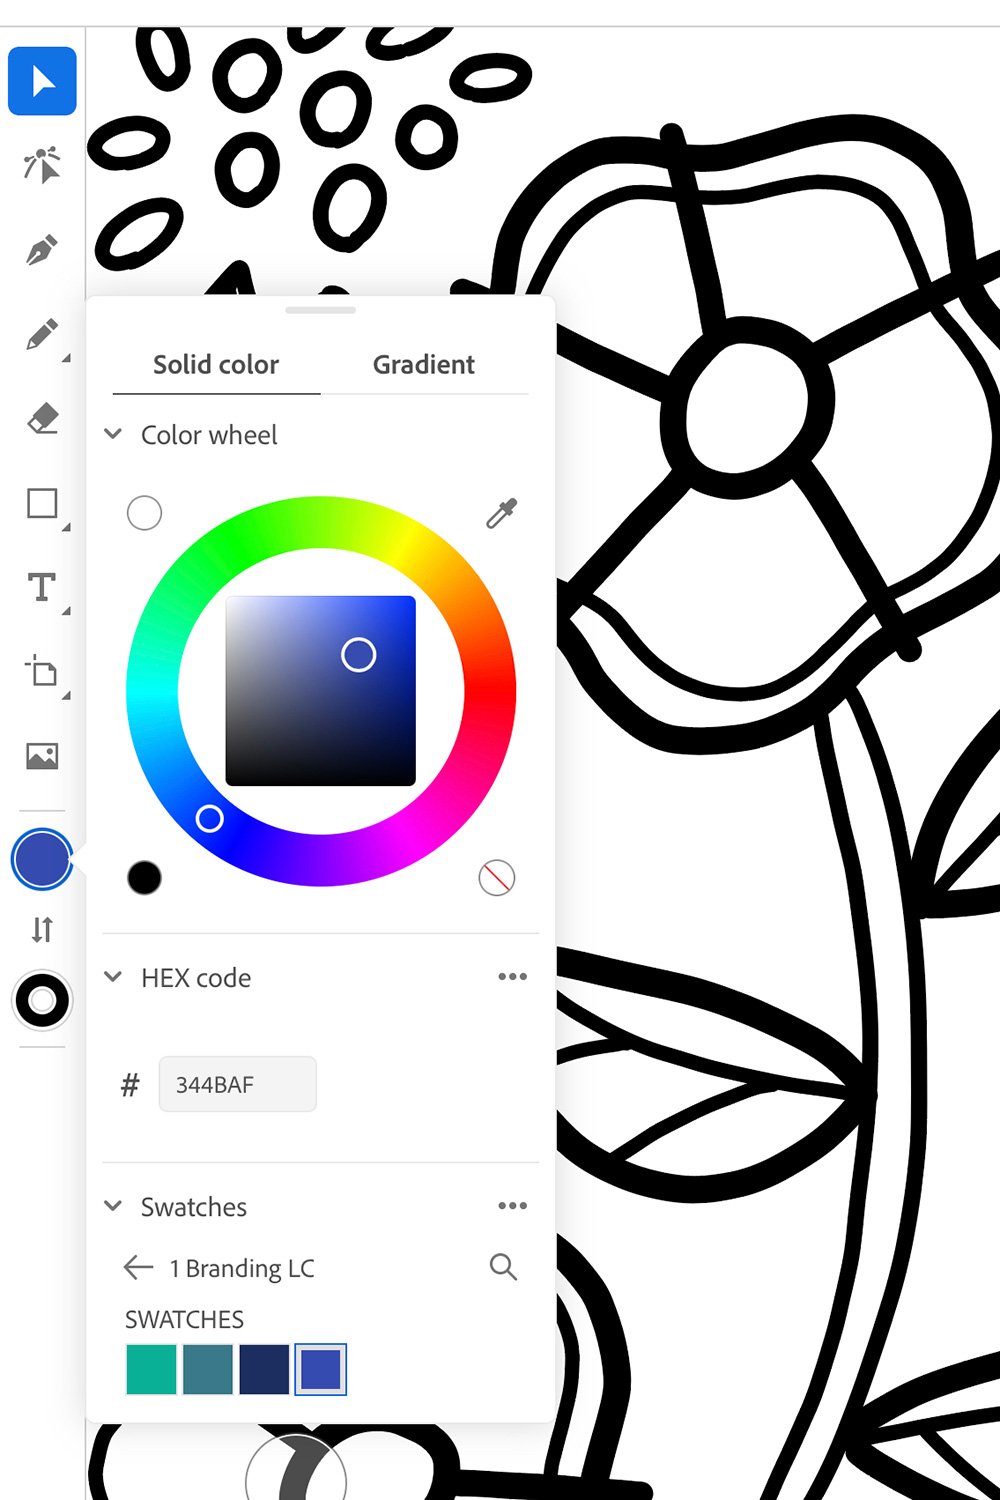
To use a color swatch, go to the Color panel, and choose Swatches > Libraries.
Vector graphics from CC Libraries will have clipping masks when you place them in Illustrator on the iPad, so use the Direct Selection tool to make edits.
Using Brand Assets in Adobe Creative Cloud Express
CC Express is Adobe’s answer to Canva for creating social media and web graphics in multiple sizes. I love that I can access my brand CC Library inside Express, and I use it regularly to create thumbnails for my YouTube videos and Instagram. Look for the Libraries icon in the sidebar menu to add assets to your project.
Check out the Creative Cloud Express blog to find out more and learn what new features are coming.
Manage Libraries in Creative Cloud Desktop
Think of the Creative Cloud Desktop app as a drag-and-drop library browser that allows you to work between your libraries and the folders on your system.
-
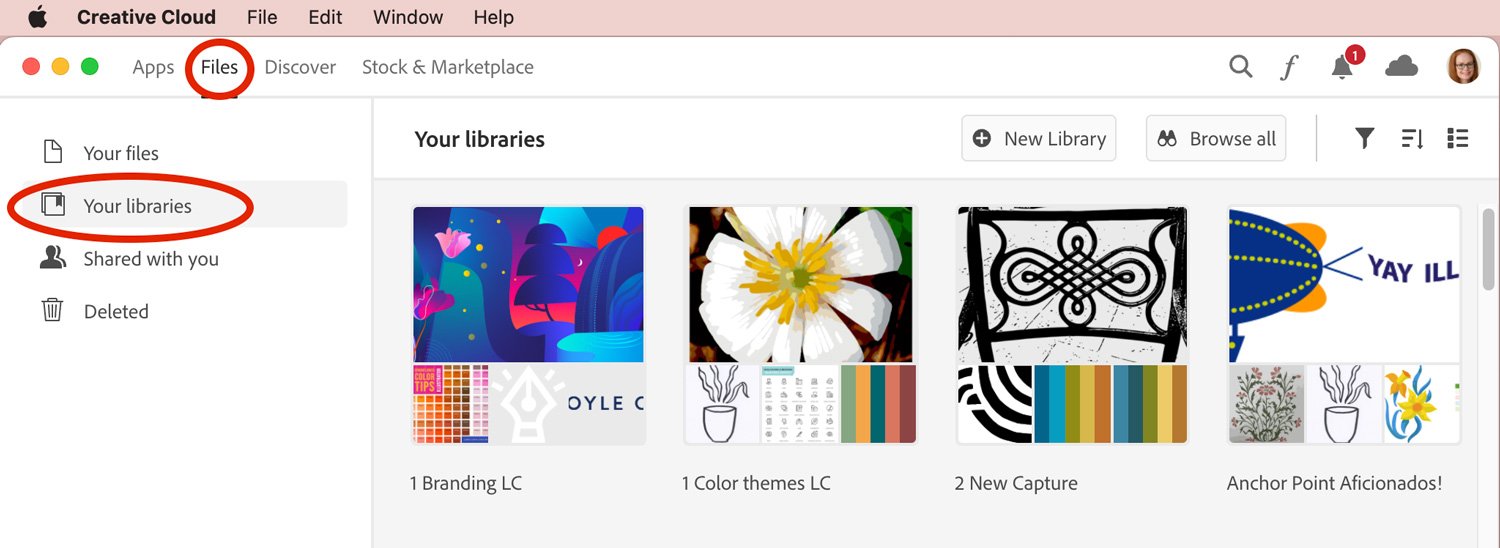
To view a library, choose Files > Your libraries.
-
Drag JPGs of your headshot and other images to add them to an open library.
-
Drag assets out of the library to copy them to your system.
-
Export a library backup by hovering over its thumbnail and choosing Export from the ••• menu. Store the .cclibs file on your system for safekeeping.
-
CC Libraries support PNG, JPG, PDF, AI, PSD files, and more. For all the details, see Adobe Help.
Using your Library Assets in Procreate
You can use PNG images of your logo in apps like Procreate. Open your library in the Creative Cloud Desktop app, then drag and drop the PNG logos to a Dropbox folder that you can access from your mobile device.
Create Libraries Now to Save Time Later
I can’t count the number of times I’ve been working on a PDF for my students or a video for my YouTube channel when having my logo and fonts waiting for me in the Libraries panel made me do a happy dance. Just start with one or two assets and see for yourself. You can continually fine-tune your system, but start small with your brand library today, and you’ll get that happy feeling, too!

Written by Laura Coyle
Website: www.lauracoylecreative.com
Instagram: @lauracoylecreative
In her 25-year career Laura Coyle has illustrated for major brands including Target, Hallmark, Hasbro, Amazon, Disney and Papyrus — all while working in Adobe Illustrator. As an instructor she loves making Illustrator and Creative Cloud accessible and teaching you the “why” behind her techniques.


Great tips! I don’t use my libraries nearly enough…yet