
Professional brand photos are an invaluable marketing tool, but the process of taking them can be overwhelming. This post will help you prepare to get the most out of your shoot, whether you hire a professional or take your own photos.
Prior to starting my journey in surface design, I worked in corporate marketing for over 20 years. One of the big takeaways from my marketing days is that at the core of every brand is a story. When I launched my company, I thought a lot about what story I wanted to tell through my marketing. This framework helped guide much of my marketing and strongly influenced how I approached my brand photography.
WHY TAKE BRAND PHOTOS
Outside of a portfolio, brand photography can be one of the most useful tools to promote your business. Photos introduce you as a person and they can communicate aspects of your personality, values, and style in an instant. They can be used in several different marketing channels, including portfolios, social media, websites, newsletters, and more.
A good photoshoot can generate photos for all your marketing programs and should provide images for the current phase of your business into your next phase. I initially used my brand photos to launch my company. Because my photos are all so consistent with my brand, I’m still using them in ways that I couldn’t have anticipated nearly two years later.
PLANNING YOUR SHOOT
I’ve got so much mileage out of my photos because of the thought I put into the initial photo shoot. That’s not to say it was easy, but a little time and effort up front allows for a photoshoot that’s productive, enjoyable, and adds considerable value to your business.
Below are some tips that I used when planning my brand photos.
What’s your story?
As I started to plan my shoot, I went back to my marketing training and thought about what stories I wanted to tell. I wanted potential clients and customers to know who I was as a person, what values were important to me, what influences inspired my work and how this drove my creative process. Your stories may be different, but I found these to work well. They’re broad enough to encompass many different types of work and styles, but specific enough to be useful in most marketing materials.
These stories not only helped me focus on what I wanted to communicate, they also helped to drive decisions about things like color palette, shot lists, and locations.
Action Item:
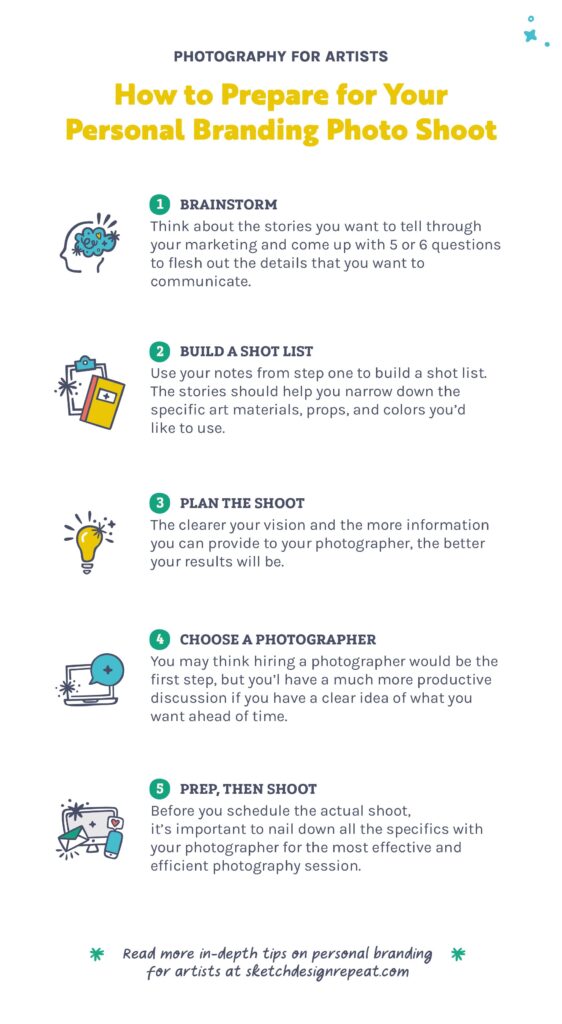
Think about the stories you want to tell through your marketing and come up with 5 or 6 questions to flesh out the details that you want to communicate. The questions I focused on were:
1: Who are you?
- Personality/Tone
- Style
- Inspirations
- Ideal Customer
2: What / Who are your influences?
3. What is your creative process?
4. Who is your ideal client or clients? How do you collaborate with them?
5. How do you want to promote your business? What sort of shots would be helpful for different promotional purposes?
Related Article: The Basics of Surface Design Marketing
From story to shot list
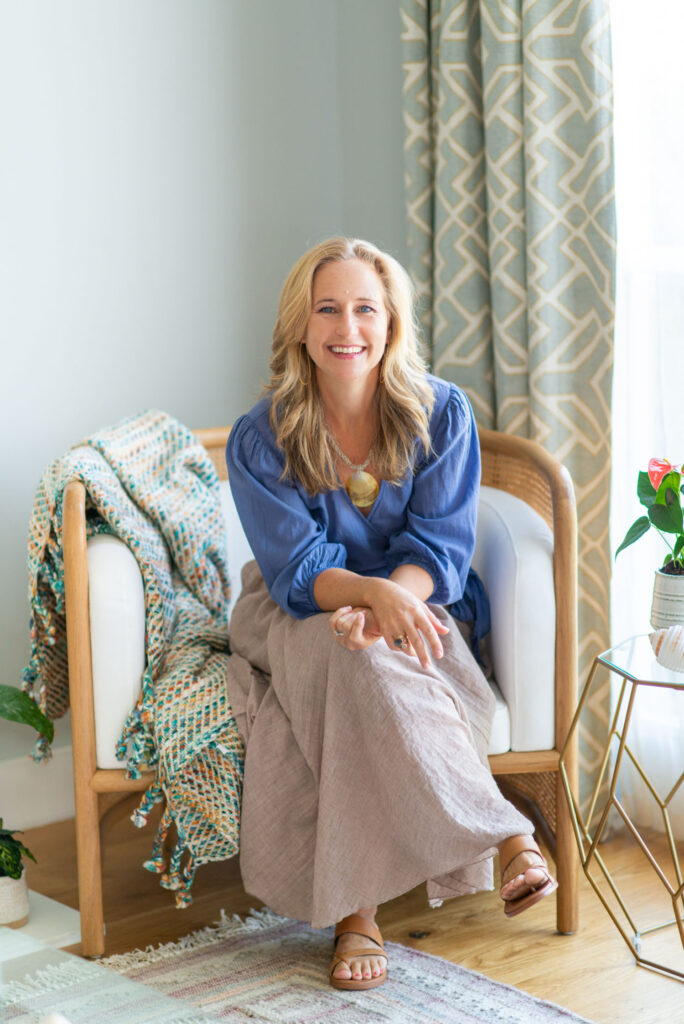
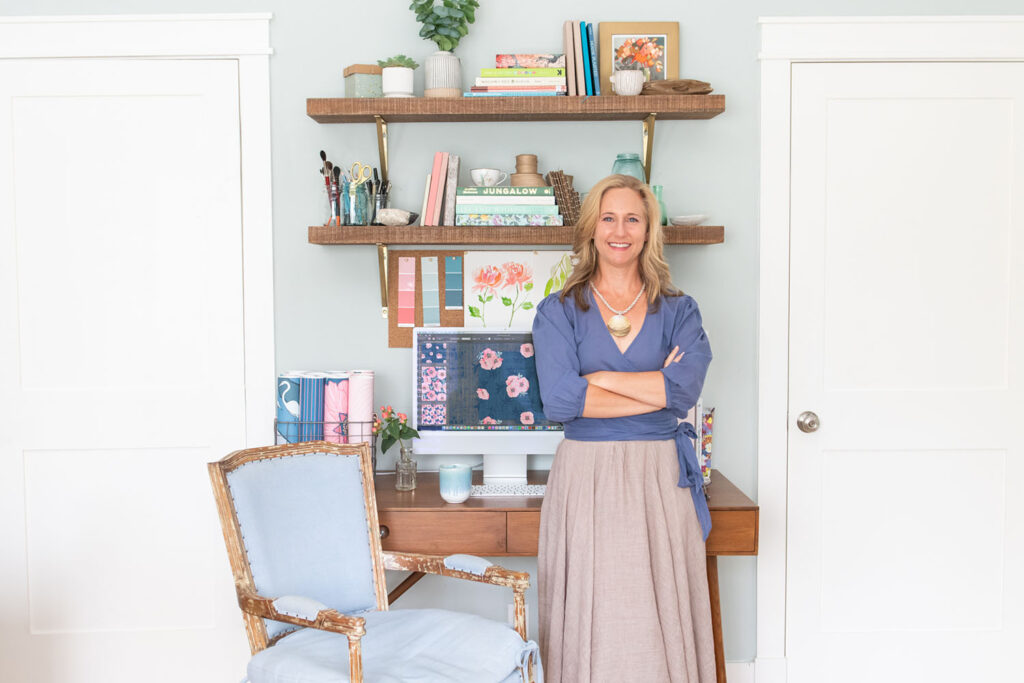
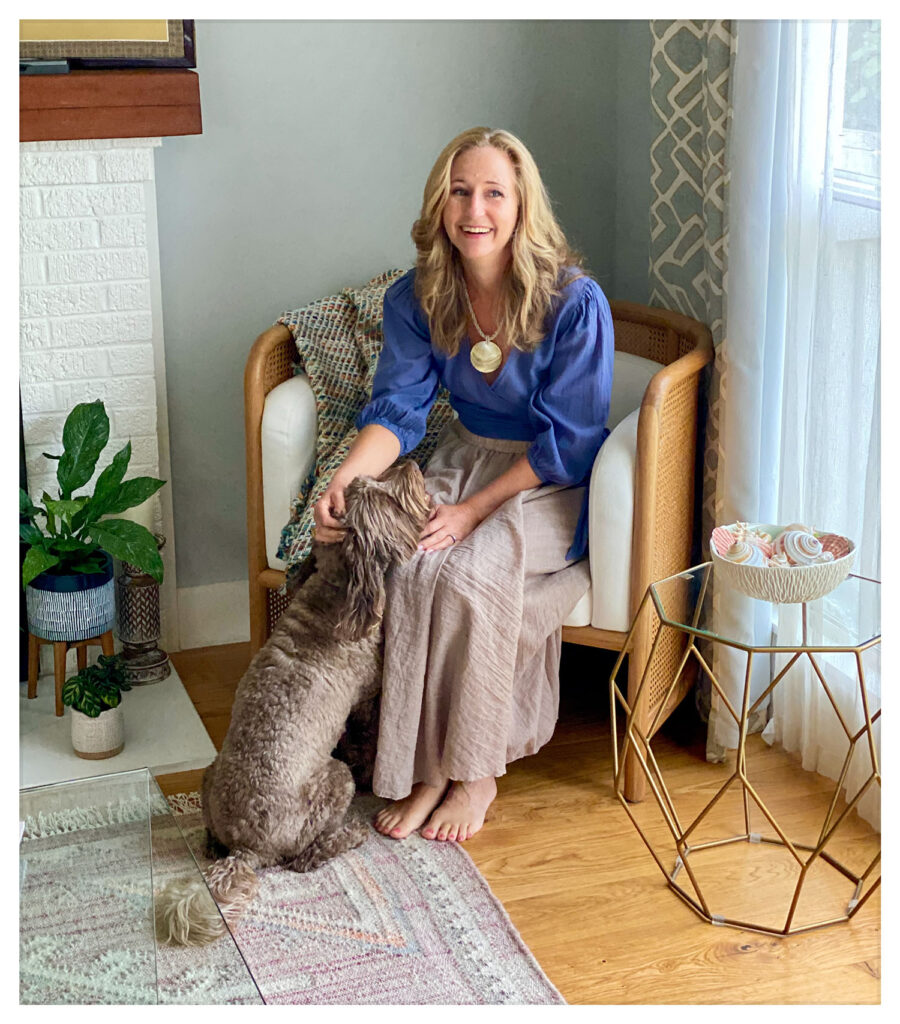
Coming up with a shot list was much easier once I knew what stories I wanted to tell. I took the answers from the questions above and brainstormed 5 – 10 shots that could communicate my ideas. In addition to the types of shots, this framework also helped identify specific details. For example, I knew I wanted a headshot, but understanding that I wanted to convey “friendly, approachable, optimistic and natural” allowed me to be much more specific with a pose for the shot. My description went from a generic “headshot” to “sitting shot, leaning forward, looking into camera smiling.”
Thinking about these stories added a consistency to my photoshoot and helped define everything from what I wore, how I styled my hair, the location, lighting, and dozens of other small decisions. The stories also helped me narrow down specific art materials, props, and a color palette.
Below is an example of some of the initial notes I took for my first photos and how I used the questions to come up with a series of very specific shots.
Who am I?
- Personality: friendly, approachable, open, optimistic, fun, creative, natural, casual
- Style: modern classics, casual, eclectic
- Inspirations: nature, Northern California, beach culture
- Interests: outdoors, travel, adventure, interior design
Shot list:
- Sitting, leaning forward, looking into camera smiling
- Candid laughing looking off camera
- At desk working surrounded by work samples, or items that inspire
- Outside sketching or observing nature
Action Item:
Look at the answers to your questions and start thinking about how to visually communicate these ideas. Jot down specific pose ideas for each story that you want to tell.
PHOTOSHOOT PREP
Once you have a detailed shot list, it’s time to start planning the shoot. The clearer your vision and the more information you can provide to your photographer, the better your results will be. Here are a few other considerations for the planning phase.
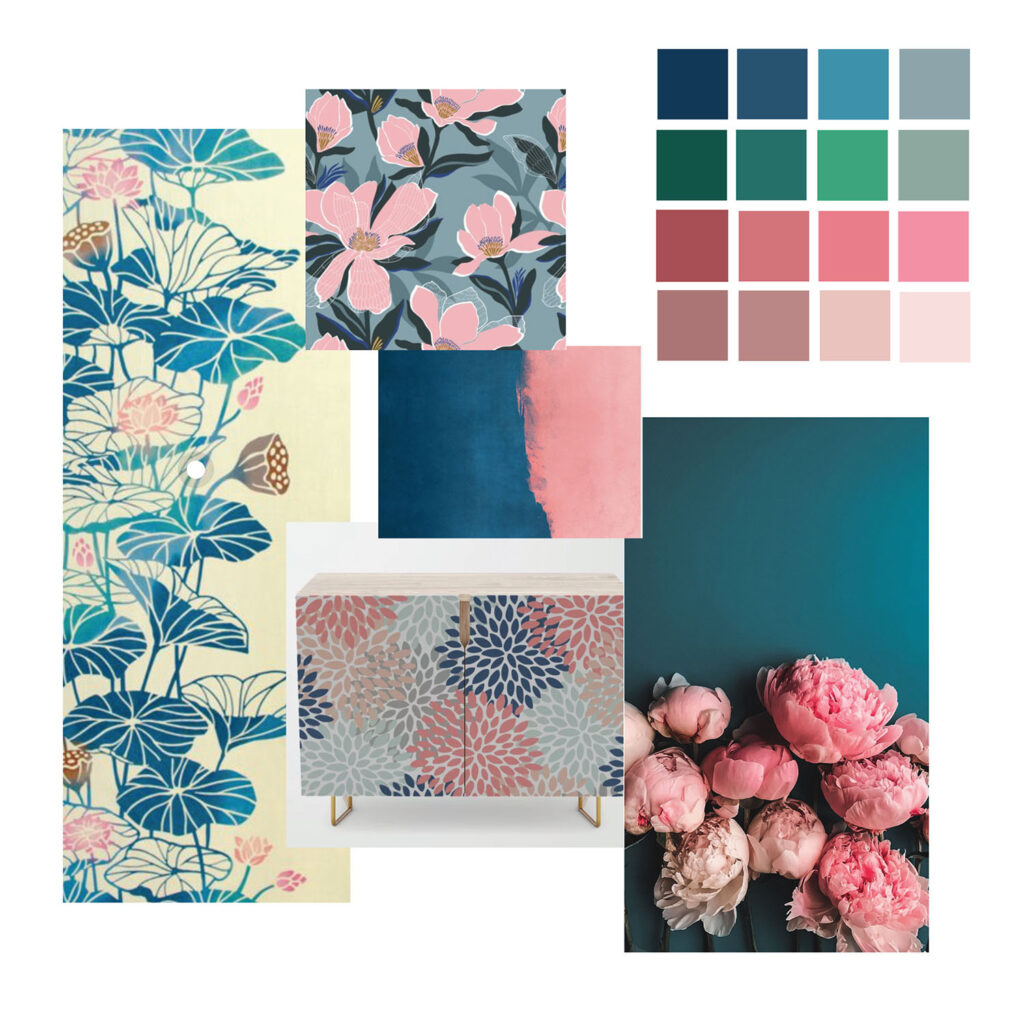
Color Palette
I had never thought about a color palette for a photoshoot, but of course it makes sense. A color palette will make your photos look more consistent and professional — giving a cohesive look to all your marketing communications.
If you’re not sure where to start, look at your work — do you have a consistent color palette in your designs? If you use a lot of different colors, go back to your stories and see if there are some details that inspire color options. For example, if you have a romantic vintage style, you may want to look at more muted pastel tones. If you have a more modern urban style, maybe bold, bright colors will fit better.
If you’re still stuck, look around your house. What color are your clothes, walls, throw pillows, bedding? You may have surrounded yourself with your color palette without realizing it.
After looking at my patterns and my house, it was obvious my color palette was shades of blues, pinks, and greens. These colors also communicate the outdoors and nature, which are a big inspiration for my work.
Keep your palette in mind when choosing your clothes, props, locations, and other details in your photos.
Location
Locations are a great way to express the stories you want to tell through your photos. Again, go back to your original questions and think about how the location can communicate your ideas. If you’re inspired by nature, do you want to shoot outside? If you want to communicate ideas about family and home, think about drawing at a kitchen table surrounded by your designs. How else can you communicate your ideas through your location?
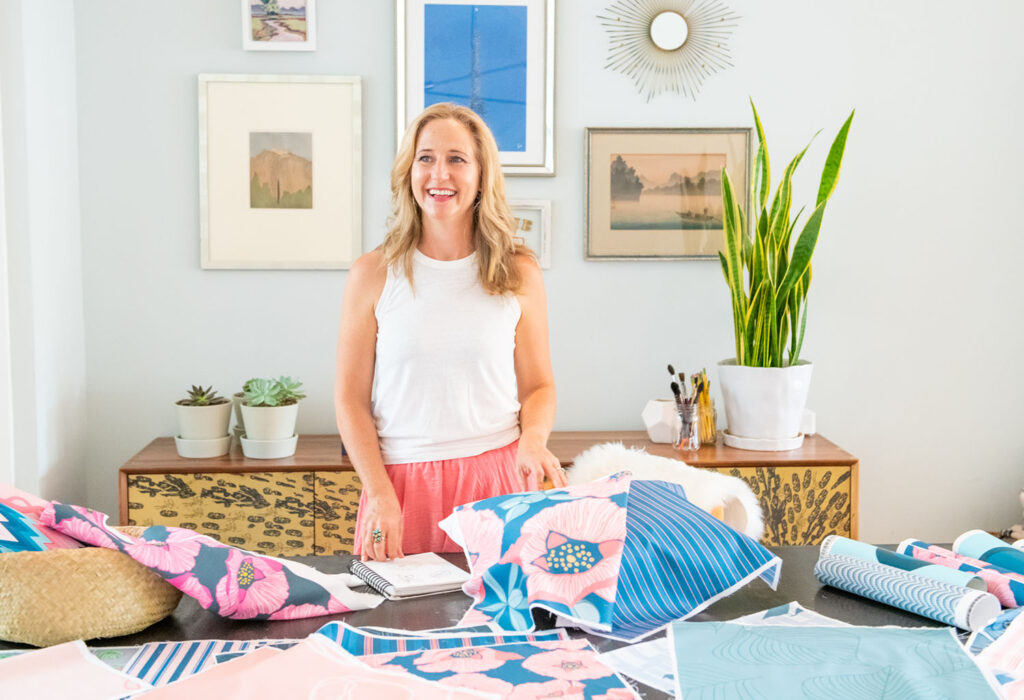
My photos were all taken in my house, so this doesn’t need to be overly complicated. However, I did spend some time looking around my house for the best locations with good lighting where I could tell the stories I wanted. I chose my living room, my desk, and my dining room, which we rearranged to look more like a studio.
Props
Props help tell your story through details in your photos. Think about what else you can include that can show your unique style, inspirations, or values. What sort of artwork, furniture, books, plants, or other treasures can help tell your story?
Keep your color palette in mind as you start to put together your prop list. I have a bookshelf above my desk, and I wanted to style it with items that inspired me like art supplies, books, plants, seashells, and other similar things. Since there were so many items on the shelf, I wanted it to look organized and not distract from the main focal point. A color palette helped these items feel like they all went together and complimented the image, rather than creating a distraction.
Show your work! Samples are a great prop to use in your photos. Fabric, wallpaper, stationery, wrapping paper, clothing, or any other items with your designs are a great way to communicate your creativity and working style through images.
Don’t feel like you have to buy a bunch of new things for props. I found most of my prop items around my house and borrowed a few books with blue and pink bindings to work with my color palette.
Wardrobe
Whether you thrift or buy designer labels, clothes are a great canvas for patterns, and most of the pattern designers I know are slightly obsessed with fashion. However, for your photoshoot, the focus should be on the story you’re telling, so your clothes should be in the service of creating a great image.
Go back to your answers again and think about how your clothes can tell your story. Do you love all things coastal, or do you want to communicate a more worldly aesthetic? Clothes can be a great way to express these styles. Like a color palette, your clothes may already innately communicate a lot about you, but it’s helpful to think critically about which particular outfits would be best for the photos.
If you design patterns for apparel, wearing some of your own designs could be a great addition to your photos, but keep these hints in mind when wearing patterned clothes. Avoid patterns that may clash with the other elements in your photos. In general, more subdued patterns or solid colors work best. That said, if you choose a pattern that compliments the overall image, it can still work. Just think about the other elements in your photo — are you sitting on a chair that has patterned upholstery? Do the colors in the pattern clash with the background?
As with the other elements in your photos, keep your color palette in mind when choosing your wardrobe for the shoot. And don’t be afraid to have more than one outfit. You may want something more professional and buttoned up to use in a portfolio for licensing partners, and something more casual for an etsy shop that sells directly to your customers.
Hair and Make-up
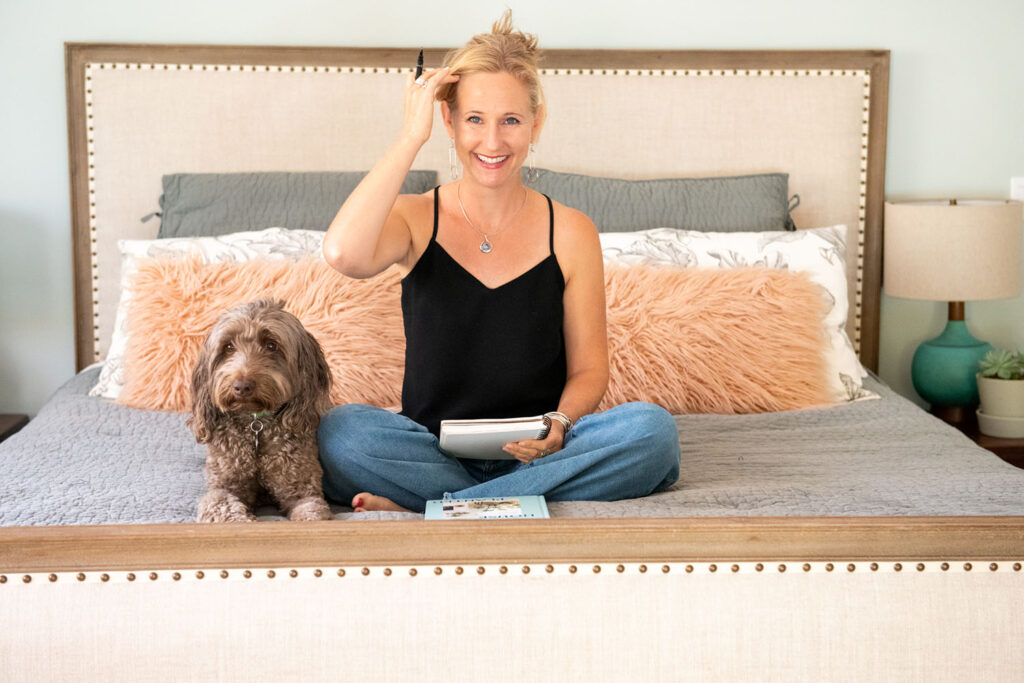
Like your wardrobe, hair and make-up can communicate your style. Don’t be afraid to plan a few changes during the shoot if you want a few different styles. For my shoot, I had some photos with my hair down and more styled for the professional headshots and some with my hair in a messy bun for creative process shots.
I don’t normally wear make-up, but I would recommend it for photos. When you’re thinking about make-up, stick to your typical look, but turn up the volume. What felt like a lot of make-up to me, still looks very minimal in the photos.
As you get closer to the shoot day, take care of yourself so you look and feel your best. Sleep well, drink lots of water, and moisturize! Well rested, hydrated skin looks better in pictures. Get your hair done, paint your nails, or do whatever will help you to look and feel your best for the shoot.
Action Item:
How do you tell your story through things like props, location, wardrobe, and color palette? Go back to your original questions and think about how you can communicate these ideas visually through each of these elements.
Create a Pinterest board for each of the categories above and start finding images that you like for each section. This can be a great tool to communicate to your photographer what types of shots you’re hoping to capture.
CHOOSING A PHOTOGRAPHER
You may think hiring a photographer would be the first step in planning a photoshoot, but I would argue, you should do the work above before talking to photographers. You will have a much more productive discussion if you have a clear idea of what you want prior to meeting with them.
For the best results, I recommend hiring a professional who specializes in portraits or business photography. If you don’t know any photographers, start looking at photos from local businesses on social media or online and see whose photos you like. When you see photos you like, ask for a referral. Schedule some interviews and see who you connect with before deciding.
In addition to a photographer’s work, think about the type of person you want to hire. I wanted someone with good communication skills who understood and shared my vision and who I could collaborate with creatively. I wanted someone who I felt comfortable with since we were going to spend a lot of time together and I wanted my photos to look relaxed and natural.
Once you find a photographer, ask them for a proposal and a sample contract. Like professional designers, photographers may want to own the rights to their photos, or only allow you to use them for a specific period, or they may want permission to use the photos in their portfolio. While I don’t have any legal advice to share, I do recommend that you have a contract in place and understand the terms before you move forward with a photographer.
If you do all the prep work and have a strong vision for your photos, you can still get quality shots without a professional. Consider using a friend or family member who likes to take photos. With this route, the prep and communication are even more important. Photoshoots are a lot of work for both parties, so have some conversations about what you want out of the session, so everyone understands the expectations before you begin.
THE SHOOT
Before you schedule the actual shoot, I recommend at least two meetings with your photographer.
In the first meeting, share your vision and ask your photographer for their thoughts. Show them your stories, shot list, Pinterest board, or any other notes you’ve taken. Your photographer may have thoughts on your locations, wardrobe, or other elements that will make your photos better. They may also have other recommendations about how to communicate your ideas. Or they may have a studio location where you can take some of the photos.
Talk about the flow of the photo shoot day. Are there shots that would work best in a certain order? (Maybe you want to wear your hair down for a few photos before putting it up, or maybe the light is better at certain times of the day in some locations). After this first meeting you should both have a clear idea of how the shoot will flow and if there is anything else you need to do to prepare.
The second meeting should be at the location of the shoot so you can discuss details or problem solve any logistics. For example, I wanted outdoor shots, but my shoot was scheduled at the end of summer during a drought and my backyard was completely brown. We walked through my house and found 3 locations that would work and discussed how the light would be in each room during different parts of the day. It would have been very difficult to have these discussions without being on location.
When the big day comes, you’ve done the work, so relax and enjoy the process!
Using your photos
Once you have your photos in hand, there are so many great ways to use them in your marketing materials. Here are some ways I’ve used mine:
- Portfolio
- Company Website
- Etsy Shop
- Spoonflower Shop
- Shopify Store
- Social Media posts
- Email Newsletters
- Decorating Blog
I hope this article has given you the confidence and tools to create your own personal brand photography. If you have any thoughts or questions, I’d love to hear from you! Good luck and can’t wait to see your photos!
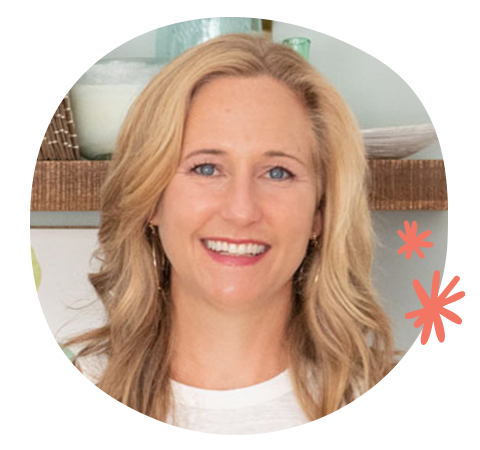
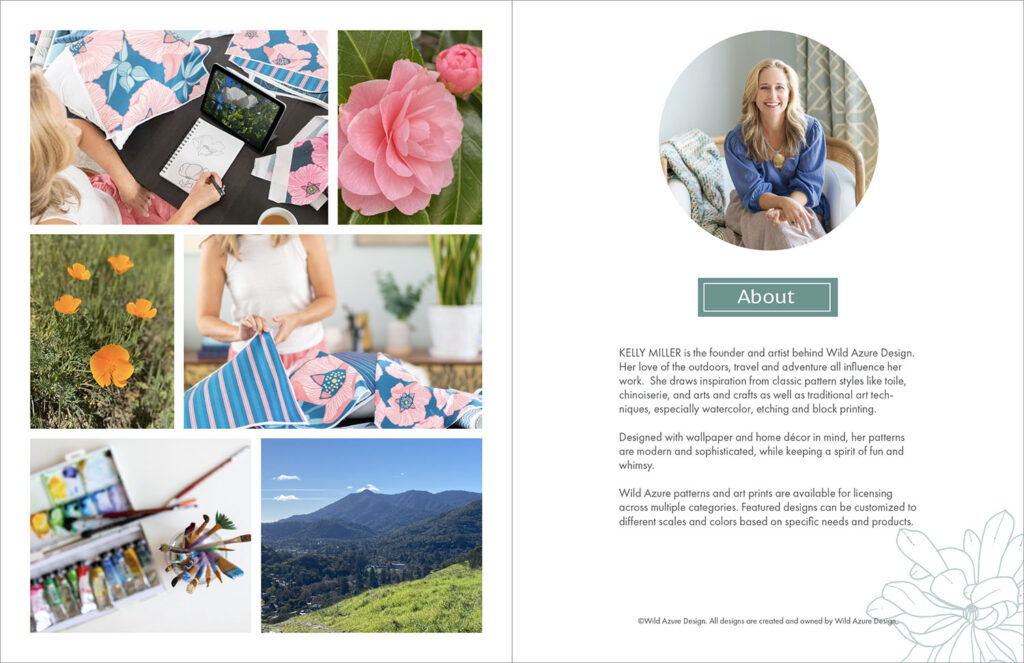
Written by Kelly Miller
Website: www.wildazuredesign.com
Instagram: @wildazure
Kelly Miller is an illustrator, pattern designer and the artist behind Wild Azure Design. Her designs are inspired by the outdoors, travel and a love of adventure. The Wild Azure style is modern, yet playful, incorporating loose expressive watercolor, with hand drawn details.


This is so helpful. I’m awful at taking photos of anything other than my work, and I know that’s a mistake when it comes to branding. Thank you!