
Scheduling social media using a scheduler is one of the best ways you can create a consistent presence, streamline your workflow, and prevent mindless scrolling “looking for inspiration” (we’ve all been there).
Plus, scheduling your posts in advance ensures that you’ll be more strategic about talking to your target audience. (If you need help identifying yours, I’ve got another post for you!)
There are several different platforms for scheduling social media like Later (Sketch Design Repeat uses their Starter plan) *affiliate link*, Meta Business Suite (for Facebook & Instagram), CoSchedule, and my personal favorite — Planoly.
I recommend Planoly if you’re new to scheduling because their free tier allows for 30 image uploads a month, which means that you can use the platform for a month or two for scheduling Instagram posts to see if you like it before committing to a paid tier. Each scheduler has its own benefits, and the tips and strategies sprinkled throughout the tutorial will be relevant to all of them!
Step One: Prepping Images
Instagram and Facebook haven’t changed their image ratios in a while, but it’s always good to check what image sizes your scheduler will auto-publish (Planoly will auto-post anything between a 4:5 to 1.91:1 ratio and has a maximum file size of 8MB).
TIP: Go with vertical images when you can because it takes more space on a mobile screen and is more likely to grab your audience’s attention!
If you’re sharing your work with the intention of having it licensed, you may feel like once you’ve shared your art or pattern once, it’s out in the world. In reality, a small fraction of your audience sees a single post (not everyone is on your profile every day, and that’s okay).
This means you can (and should) share a piece or pattern several times over a few weeks or months! Instead of just sharing a pattern, for example, you can share a process video, a close-up of some of the motifs, a mock-up of how the print could be licensed, and hopefully even a real-life sample once it’s licensed.
You can also reshare a design a few months later if you’re in a design lull and don’t know what to post on social media.
Related Article: How to Grow Your Instagram with Purpose
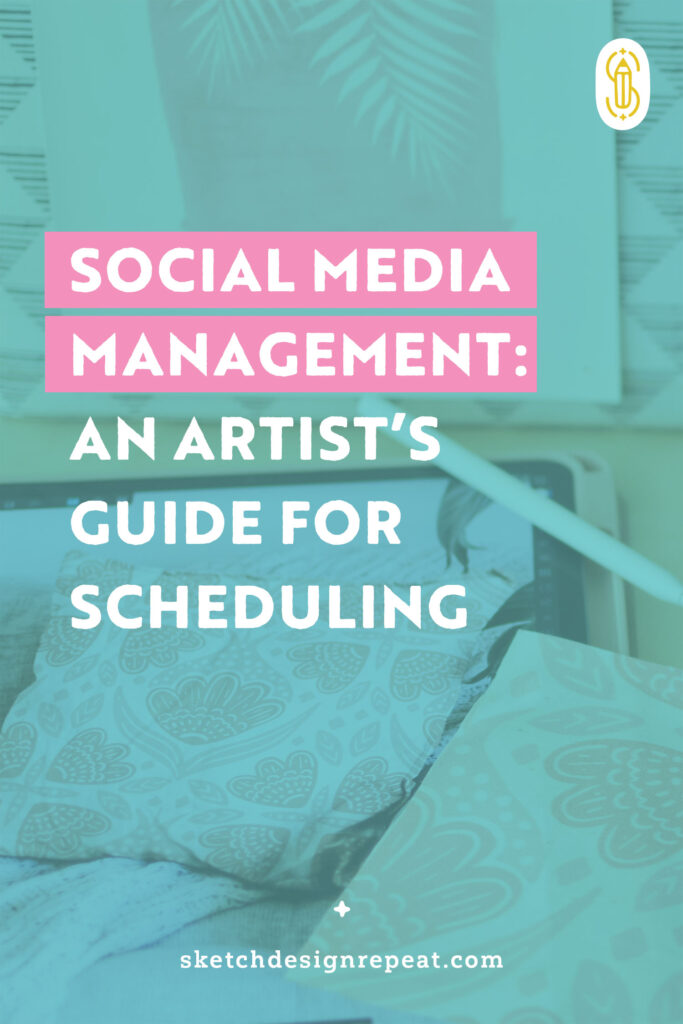
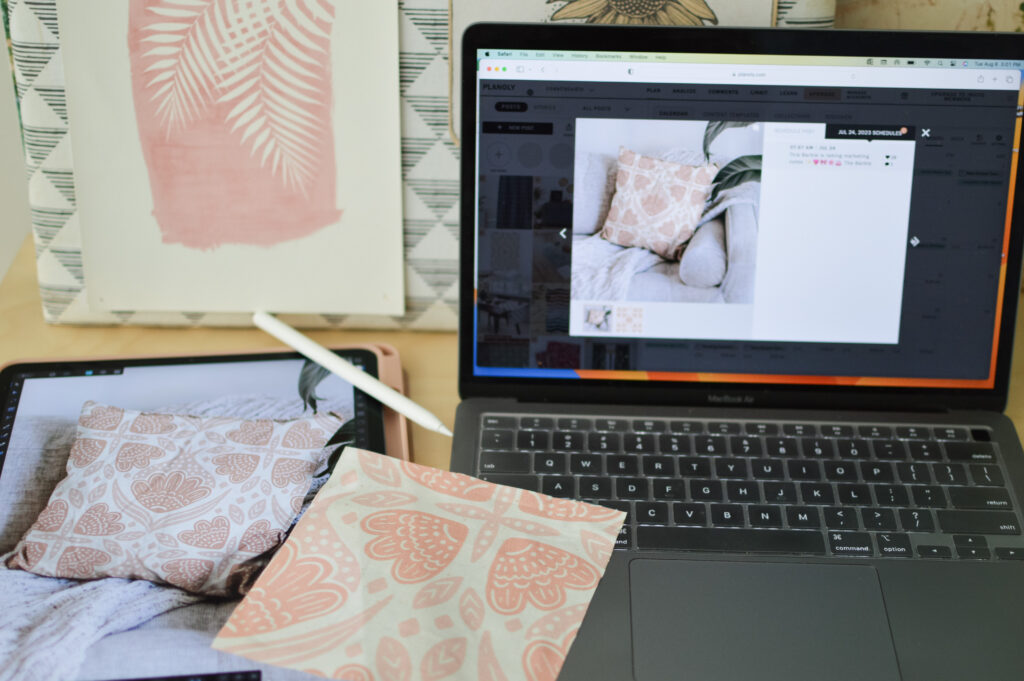
Step Two: Upload Your Images
Uploading your images (I often use the mobile app version of Planoly on my iPad for this) is fairly straightforward. You can upload a bunch of images as individual posts, or you can select a few to upload as a carousel (if you do this, make sure they’re all the same size for auto-publish).
I like to upload as many different image types as I have for each new pattern. This creates a bank of images and I use the “Unscheduled” tab as a “to schedule” list.
Step Three: Write Your Caption
Often when I upload a lot of images at once I leave some notes in the caption space (usually just ideas or specific points I may want to make in the post), but wait to write my captions until I am ready to schedule the post.
I can already hear you thinking…“But what should I write for all these images of the same piece of art?” First, you’re not alone. I’ve spoken with more than 40 artists and creative entrepreneurs over the last year about creating content, and about 80% of them felt that this was a sticking point, especially when trying to schedule social in advance.
Enter the caption sandwich (Ok, it’s really just a three-part structure, but I got hungry while writing this). It’s an easy trick to get your creative juices flowing with caption writing in batches — just start with a hook, add a message, then finish with a call to action!
Start with a hook. Your hook should be a short, attention-grabbing sentence — it can be a question, a stat, or a timely comment (part of the reason I recommend waiting to write a caption until you know when you’re going to post).
Then comes your message. This should be a few sentences and should be about something you want your audience to learn or know about you, your business, or your art. Your message should fit with one of three underlying themes: Know, Like, and Trust.
It can be informative (Know), a peek behind your inspiration or brand values (Like), or something that gives you credibility (Trust). Following these themes (and ensuring you have a mix of the three) can help customers connect to your brand.
Finally, wrap up with your call to action. Once your audience has read your message and has bought into what you’re sharing, a call to action is your chance to ask them to do something whether it’s to like the post, comment with their thoughts, DM you for more info, or head to your profile link for further info.
Technically, adding hashtags is the next step, but that’s a whole other topic for us to tackle later. So once you’ve finished your caption it’s time for the last bit — picking a day and time to schedule it!
Step Four: Schedule
And now, the easy(ish) part! If you’ve formatted your images to fit within the scheduler’s requirements, you can set auto-post. If not, most schedulers (including Planoly) have an app that will notify you when your post is scheduled, and it will help you manually post. While I prefer auto-post, the slightly more manual version is still helpful because it allows you to write your captions in advance and takes only a second to post.
I wish I had a straightforward answer on what time of day you should post, but unfortunately, that depends a lot on your audience and industry.
Personally, I post between 7 AM and 9 AM Eastern almost every morning. That time of day works for me because it’s when I have time to engage on social media (like adding a post to my story). My audience already expects me to be there because I am consistent about the timing, and I find posting earlier in the day allows for me to capture people scrolling during their lunch hour or throughout the day, since Instagram’s algorithm isn’t strictly chronological.
That’s it! You’re ready to start scheduling social media as a strategic step to market your art. If you want a cheat sheet on image ideas and more ideas for caption sandwiches, I created a freebie over on my website that you can download! Then, we can hang out over on Instagram!
Written by Leah Keggi
Website: www.LeahKeggi.com
Instagram: @coastlstudio
Leah Keggi is a Marketing Pro and Pattern Designer looking to bring a little vacation into every day with coastal inspired design! Her work has been featured on Today.com and on products at Target.com. When she’s not designing (or working in Marketing) you can find her reading, enjoying her husband’s cooking, or walking her pup!


