
The possibilities are endless with brushes in Procreate. However, the amount of options in the Brush Studio and Brush Library can be overwhelming and not always necessary to improve your illustrations or surface pattern designs.
If you create work in collections, revisit designs often, or work on different projects at the same time, it is vital to keep your brushes and their settings organized. You need to be able to restart your work in Procreate easily, without having to worry about brush sizes, adjustments, or losing handy shortcuts.
I have found a few specific ways to make drawing a little easier, less frustrating, and more organized in Procreate, using the brush settings. They don’t just help speed things up, but also create more consistency in my style. Here are a few ways to speed up your Procreate workflow and streamline your surface design process with brushes!
Brush Tabs and Categories
Even though creating new brushes (or importing brushes) is my favorite thing about Procreate, it can get a bit messy. The more brushes you make or import, the more difficult it gets to find your brushes, so it’s best to keep these as organized as possible.
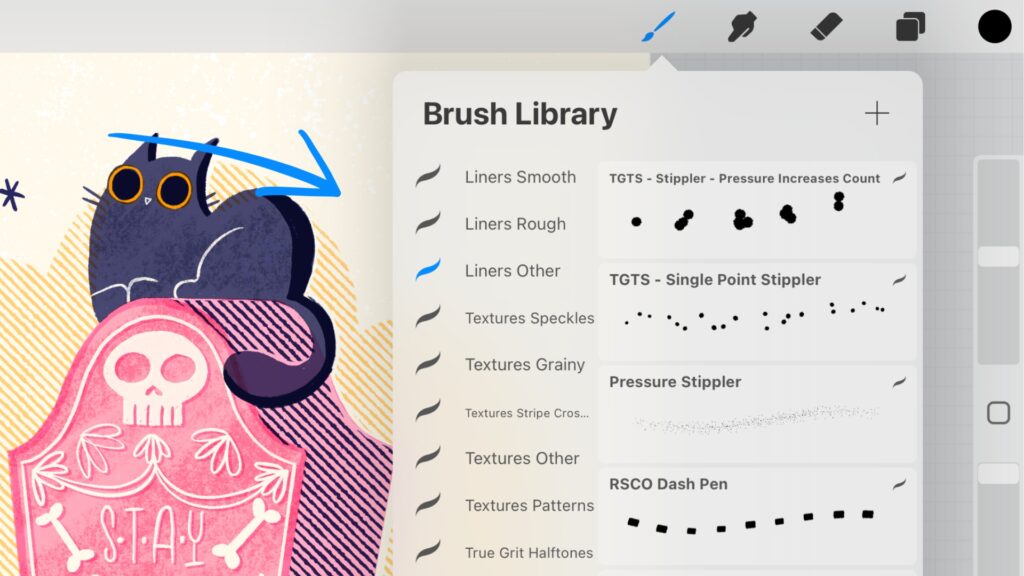
Procreate already categorizes its brushes in their own assigned tabs in the Brush Library, and you can add your own brushes to those. However, I like to create new tabs so I can keep these separate.
I personally categorize my brushes by theme or type of brush. For example, stamp brushes go in one tab, and textured line brushes in another. You can even sort them by size, line width, or style. This way, when I’m looking for one brush in particular, I know which tab to look at.
If you reuse certain brushes often, or for specific projects (or a specific client), keep those saved in separate tabs too. You can always export that brush tab to save it separately, if you know you might use it again in the future. You can always refer back to that tab (and import it) when you’re working on that particular project.
The Brush Memory Tool
Like many surface designers and illustrators, I often create collections, and need to make sure I am very consistent in the line weights I’m using, including in separate files. Saving your brush sizes makes it a lot easier to control the line weights in your work and reuse exact sizes if you need to.
Better control over your brushes sizes means more consistent lines, and more intentional lines too.
Having lots of different line weights can become messy, and I love sticking to the same line weights, especially when it comes to lettering.
The brush slider on the side of your canvas that allows you to change sizes can also save your favorite brush sizes. Simply tap the slider, so the size screen pops up. Tap on the plus icon to save the brush size, which will add a magnetic marker. You can do the same with the opacity slider.
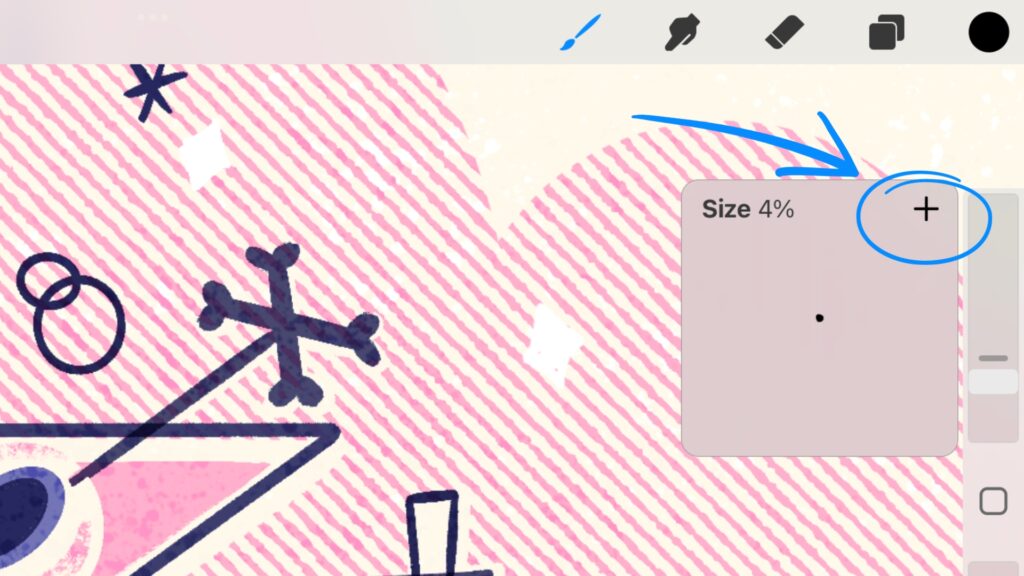
These markers you add are now part of that brush; meaning if you open a new file, or export that brush, those markers will still be there. You can add more than one marker on the slider, so you can save multiple sizes and opacity settings.
If you want to delete a marker; tap on the marker and tap the ‘-‘. Keep in mind that your saved brush sizes don’t change when using different canvas sizes.
Related Article: Planning Your Surface Pattern Designs
Using Procreate
Reset Points
If you like making adjustments to existing brushes, or experiment with creating your own, it’s important to make sure you don’t lose your favorite brush adjustments. Set reset points so you don’t lose existing brush settings, and can always revert back to the original settings of your brush if needed.
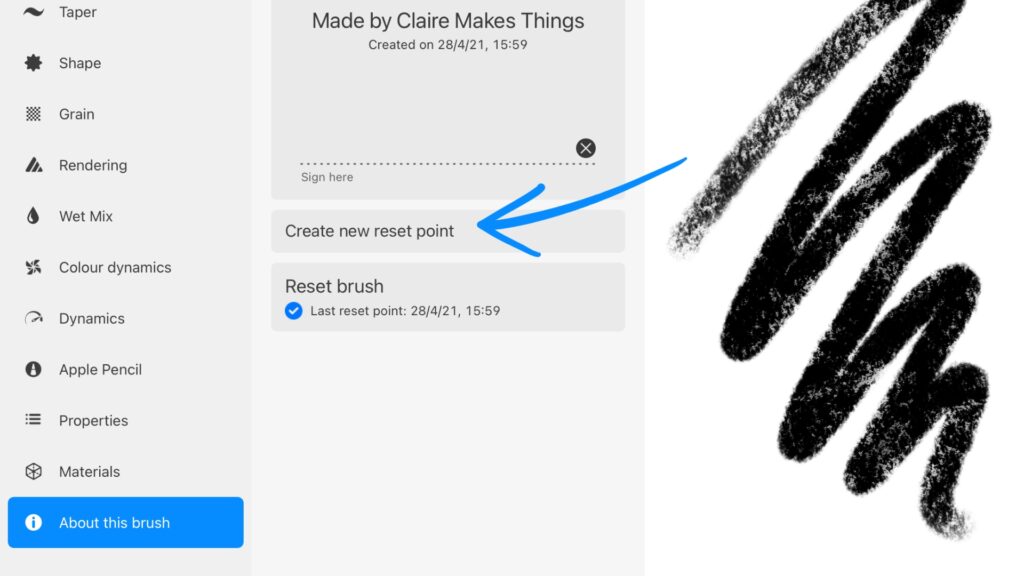
To create a new reset point, tap on a brush to go to the Brush Studio. In the ‘about this brush’ section at the bottom of your adjustments, tap on ‘create new reset point’ to save the original settings. If you change the adjustments of your brush, and would like to revert those changes, you can tap on ‘reset brush’ to go back.
Any time you create a new brush, make sure to set that reset point up straight away. This way, you’ll never lose those settings, even if changes are made later on. I sometimes like to change the stabilization settings in the Brush Studio of a brush for more control, but want to keep the original settings too. With a reset point, I can always revert those adjustments.
If you want to make changes to an existing brush, but keep the original too, you can duplicate the original, and keep two separate versions as well.
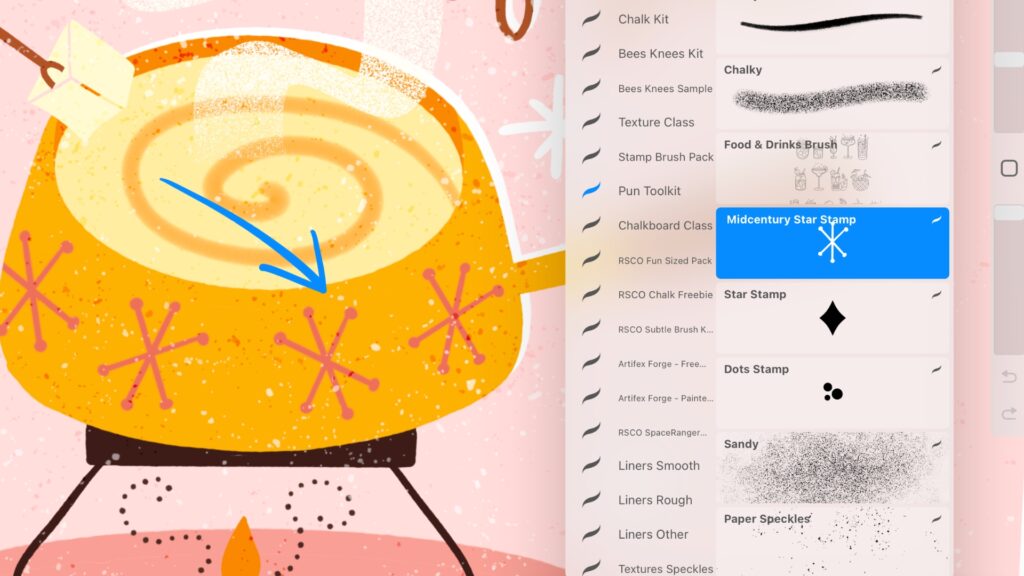
Stamp Brushes
Stamp brushes are like any other Procreate brush, but with a specific shape. They’re a great way to speed up your workflow by saving specific shapes or textures that you use often. I like saving filler elements (stars, dots, flourishes and more that I use often) as stamp brushes, so I can set the tone of my designs quickly. Reusing these elements is also a great way to show a bit more consistency in your work and an easy way to fill empty spots in the background, around letters or in a pattern.
I also save simple templates, guides for hand lettering, and textures as stamp brushes, so I have these ready to go when I need them. I even have my own signature saved as a stamp brush, so I can easily add it to my work whenever I need to.
If you want to create your own, simply start by making a regular brush and paste your shape into the shape source menu in the Brush Studio.
Don’t forget to toggle on ‘Use Stamp Preview’ in the Properties menu, so you can see the preview of your stamp brush in the Brush Library. Remember to name your stamps accordingly (and create a reset point), before you end up with an ‘untitled brush 1 1 1 1’ type of situation!

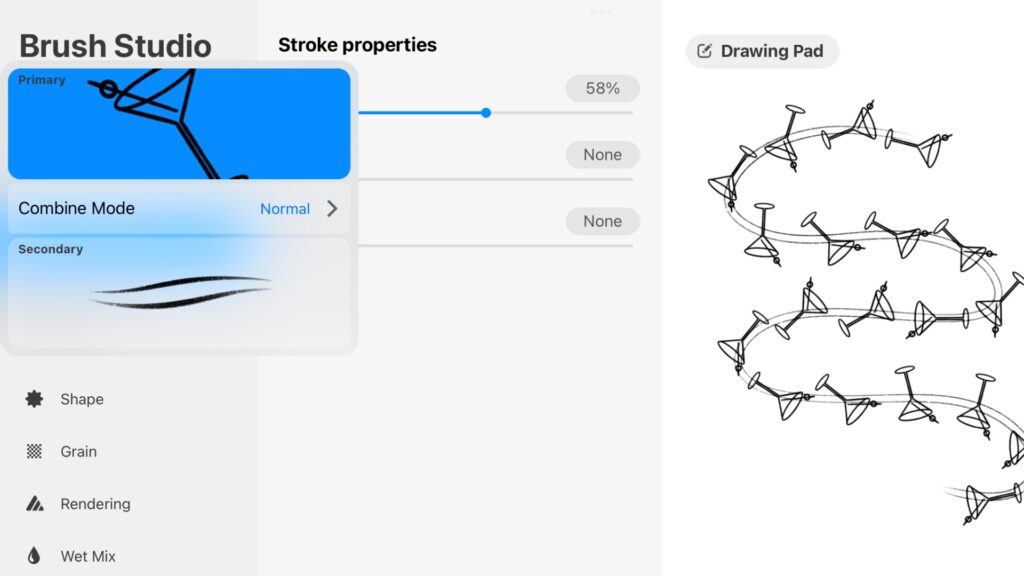
Combining Brushes
Sometimes you like the properties of one brush, but the look of another. Or perhaps you want to combine a stamp brush with a simple line brush. You can easily create a merged brush of both in the Brush Library. A Dual Brush uses each brush’s shape and grain to create a new, combined version.
To do this, tap on the first brush you want to combine, then swipe on the second. At the top right of the Brush Library, tap ‘combine.’
Now, tap on your new dual brush to open up the Brush Studio to make adjustments. You can make edits to the brushes independent of one another, and change how the brushes blend together. You always have the option to ‘uncombine’ your brushes if you prefer to use them separately later on.
Other Helpful Procreate Brush Options
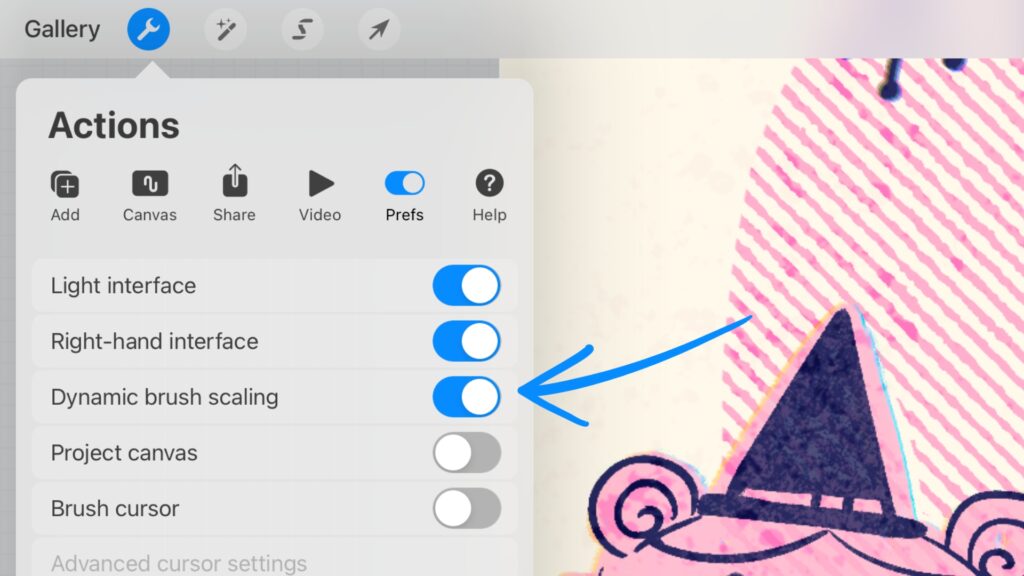
Dynamic Brush Scaling
This setting is especially useful if you do a lot of zooming in and out and you don’t want your brush size to change. You also don’t want specific line widths to change constantly, since that can be pretty disrupting to your workflow. To fix this, tap the Actions panel > Preferences > toggle on Dynamic brush scaling.
Quick Eraser
When you need your brush to act as an eraser quickly, hold down the erase icon to be able to use the same brush as an eraser. This also works the other way around, or with the smudge tool.
Pin Your Favorite Brushes
Swipe left on your favorite brush in the recents tab (that’s the top tab in the Brush Library), and tap ‘pin’ to save it in the recents tab. This way, you can save your favorite brushes quickly to the top.
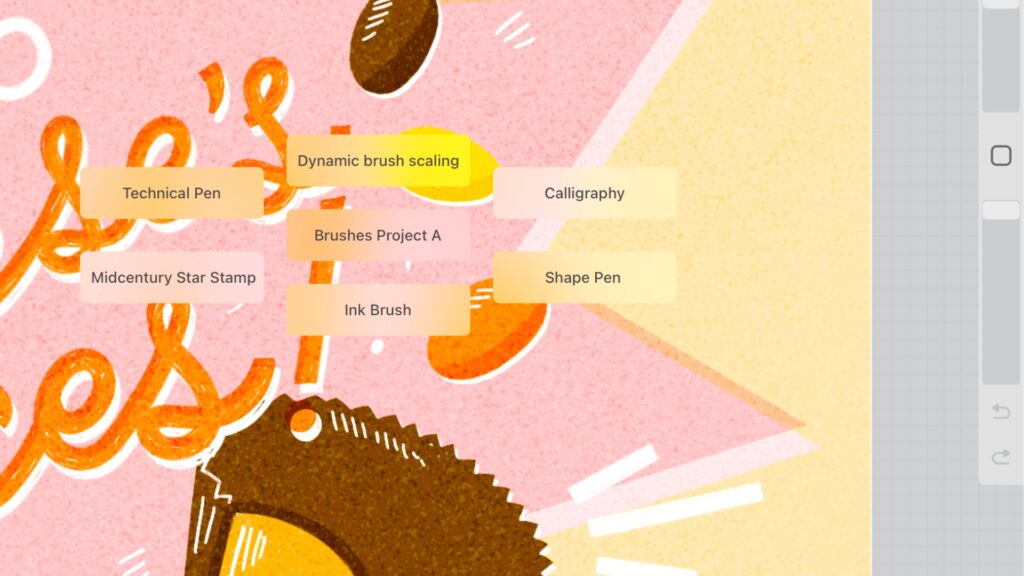
QuickMenu for Brushes
There are plenty of shortcuts for brushes in the QuickMenu. There are different ways to access the QuickMenu that you can adjust yourself. Tap the Actions panel > Preferences > Gesture controls > QuickMenu, and toggle a shortcut to activate it.
When you hold down your QuickMenu, it gives you options to change up the shortcuts inside the menu, which is useful when you’re making a lot of changes and need lots of shortcuts. For example, you can create a menu full of your favorite brushes, or brushes you need for a specific project. You can create multiple QuickMenus and name them accordingly.
Stabilization and Motion Filter Settings
Don’t forget to check the pressure sensitivity settings of your Apple Pencil, since this has a huge effect on how you can use your brushes. These settings can help you if you struggle with creating smooth lines or strokes.
Check all the options by tapping Actions > Preferences > Pressure and Smoothing. All brushes also have stabilization options separately, in the Brush Studio, which can be changed independently.
And you’re all set! These are a few ways to streamline your design process in Procreate by using brushes more efficiently.
Remember that all the different brushes, adjustments, and shortcut options are there to guide your creative process and complement your work, not to overwhelm you, so use these tools to your advantage.

Written by Claire van Kuijck
Website: clairemakesthings.es
Instagram: @claire.makesthings
Claire, of Claire Makes Things, is an illustrator and teacher from the Netherlands, based in Madrid, Spain. She creates murals, chalkboard designs, greeting card designs and more, and teaches illustration and graphic design. She loves all things retro, cocktails, and riding her motorbike.


I had NO IDEA you could combine brush styles into a Dual Brush… thank you for the tip!
Glad to hear it was helpful!